Visit Create accounts ensure that each user has the appropriate level of access and control over the features and information they need. Each account has a flexible and customisable system of roles and permissions. In this section, you will learn how to create and assign user accounts with different roles and permissions, and what each permission entails. By using roles and permissions, you can optimise your workflow and collaborate with your team members more efficiently and securely.
Users within an organisation may need to perform different activities within Visit Create, and be allowed to see, add, or change particular types of information. For example, one person may be responsible for configuring an event and creating registration forms, while another manages exhibitors and partners. Through the roles and permissions features, Visit Create allows you to define groups of tasks and allocate appropriate rights to each user.
Access from homepage: Select your event > Organisation > Accounts
This page describes user accounts with their different roles and available permissions.
Permissions
Permissions grant access to various features within Create. Each role can have one or multiple permissions, and similarly, accounts can have one or a combination of roles.
When granting access to a permission, you can set the following access levels:
- No Access: the features will not be available at all
- Read Only: a user will be able to view the information, but not add, change, or delete anything
- Read/Write: a user will have full access to edit the information in this feature.
Note that for most permissions only the Read/Write access level is relevant, and thus made available.
Please see the list below containing the available permissions along with their description, prerequisites, and possible actions depending on the access level granted:
| Permission | Description | Prerequisite permissions | Read Only | Read/Write |
| Organisation | Allows users to manage information relating to their organisation and create items that can be used across multiple events within an organisation, such as custom fields, documents, questions, pages, scripts and translations. For example: questions, if created at organisation level, can be used in multiple events. This helps standardise your data. | N/A | Set up organisation, create custom fields, run SPF Diagnostics and manage subscriptions. Users can set PSP profiles and access contact details under GDPR. They can add translations, images, registration types at organisation level as well as design documents, create pages, questions, and scripts. | |
| Events | Allows users to set up events and create items which can be used across the event, like documents, questions, pages scripts and translations. | Export codes list and shop items. | Set up event, add translations, images and registration types, configure Visit Connect and Visit Discover, add labels, codes, shop items, design iCalendars, pages, questions and scripts. | |
| Forms | Lets you configure forms and create pages, questions, scripts. | N/A | Configure forms and create pages, questions, scripts. | |
| Documents | Gives user access to create and edit documents such as badges, vouchers. | N/A | Add and edit documents. | |
| Email designs | Allows users to add, design and delete email templates which will be sent to visitors and exhibitors. | N/A | Add and edit email templates. | |
| Profile & Products | Enables users to add event and partner digital content and print their related Scanpoints. | Export and print Scanpoints | Add and edit digital content, export and print Scanpoints. | |
| Accounts | Allows users to manage user accounts and API-related information, such as API keys. Note that a user with the Accounts permission will only be able to assign roles which contain permissions that they have access to themselves. | View account information, permissions and roles. | Manage user accounts (add, export, user roles, activities) and API Keys. | |
| API | Enables users to manage API advanced settings and statistics. | N/A | API advanced settings and statistics. | |
| Roles | Enables users to manage the roles and specify which permissions each role contains. | Accounts | View available roles. | Manage all user roles and permissions. |
| Visitors | Allows users to view and partially manage visitors in Service Centre. | View information about visitors’ contact and registration data. | Edit visitor information, add and import new visitors, and send confirmation emails. | |
| Partners | Allows users to view and partially manage partners in Service Centre. | N/A | Add, import, manage and delete Exhibitors, send confirmation emails, manage orders, activities, and have an overview of all emails sent. | |
| Intelligence | Enables users to view event-related metrics and reports. | N/A | View and filter the Intelligence dashboard. | |
| Onsite | Allows users to do the set-up of the Visit Create products and services that will be used on-site. | N/A | Manage Check-in settings, manage Check-ins, manage locations, view Check-in Lite devices, manage Visit Create imager, view Touchpoints information, set-up alerts, cameras and RFID readers. | |
| Connections | Enables users to see the leads exhibitors collect with Visit Connect products. | Partner | N/A | View and export connections file. |
| Approve & Decline | Allows users to verify and approve/deny registrations in Service Centre. | Visitor | N/A | Can approve or deny visitor registrations in Service Centre. |
| Export | Allows users to export data from Visitors and Partners. | Visitor and/or Partner | Export visitor/partner details, seminars, orders, and activities; generate visitor documents. | Allows for all the actions in Read Only + the ability to create mappings. |
| Bulk Email | Allows users to bulk email participants from the Service Centre. | Visitor and/or Partner permissions (Read-only). Sending registration confirmations is permitted as standard for users who have Read/Write on the Visitor permission). | N/A | Bulk email visitors and partners from Service Centre. |
| Bulk Update | Allows update of visitor data by importing data with their identifying reference or using the bulk update function. | Visitor | N/A | Bulk update visitor data. |
| Refunds | Allows users to issue order refunds. | Visitor | N/A | Can issue refunds. |
| API Write | Enables users to create and update API data. | N/A | Create and update API data. | |
| Suggestions | Allows users to view, add, and edit suggestions & comments in the board. | N/A | View, add, and edit suggestions & comments in the Suggestions board. | |
| Request for Change | Allows users to convert suggestions to RFCs. | Suggestions | N/A | Users can convert their suggestions into RFCs. |
Roles
A role is defined as a set of features that a user can access, allowing you to grant similar permissions to multiple accounts. You can create as many roles as you like, each containing any combination of permissions.
Visit Create has some default roles to start. You can change these to suit your organisation, as well as add new ones.
Depending on the person intended for, an account can have different roles (i.e. Customer service, Data Manager, Full access etc), with each role having specific permissions. You can assign one or multiple pre-defined roles to each account, or you can create custom roles with the permissions you need. Refer to Permissions for more information.
Below you can find all default roles and their purpose:
Full Access – this role has all available permissions enabled and is recommended for users intended to have a complete overview of an organisation, its events, its settings, and data.
Data Manager – this role has data-related permissions and is recommended for users in charge of reporting. It has API Intelligence, Visitor, Partner, and Export permissions.
Marketing Manager – this role groups together permissions that give access to customer-facing features such as forms, documents, emails, digital content, onsite and event as well as to viewing and measuring participant-related data – Visitor, Partner, Intelligence, Approve & Decline.
Sales Manager – this role is meant to give access to sales teams to reports with Read-only permission.
Operations – this is a wider support role meant for users who oversee the on-site setup as well as forms and documents, should they need to provide support.
Customer Services – this role has been designed for support users intended to help manage visitors, partners, and digital content. It also gives users read-only access to Documents and Email design.
Onsite – this role is meant for users who are responsible for the on-site set-up.
Exhibitor/VC Manager – this role is meant for users in charge of exhibitors. It allows them to manage partner-related data, including their digital content.
Export – this role allows users to export participant data.
Refund – this role allows users to issue refunds.
Account state
There are three account states:
- New: all newly created accounts have this status until the user clicks the link in their activation email. At that point, the account becomes active. The user cannot log in until they activate their account.
- Active: the user can log in and use their account. Users with Accounts permission can deactivate it.
- Disabled: the account has been deactivated. The account still exists, but the user cannot log in. Users with Accounts permission can change the status back to active.
Manage my account
This page describes how to view and edit your own account information. The details of what you can view and change depend on your account role. Refer to Roles and permissions for more information.
You can view and edit your account details on the My account page in Visit Create.
You can access My account:
- In Visit Create, select your username. This opens a dropdown.
- Select My account.
View and edit personal details
The Personal details section contains information such as your contact information, department, and job function. You can edit all the fields in this section.
Note that you must click the Save button after you’ve made any changes.
View and edit account details
The Account details section contains your username, account type, account state, and the events within the organisation that you can access.
All users can edit their username, change their password, and enable the two-factor authentication.
Change your password
- Select Change password.
- Enter your current password and new password.
- Select Save.
Suggestions & RFCs
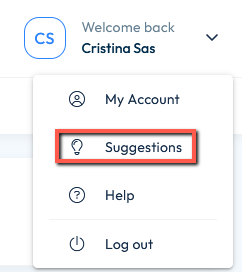
In the Suggestions board, Visit Create users with the specific permission can enter suggestions for product improvements. You can find it under your user account section, in the top-right corner of the screen:
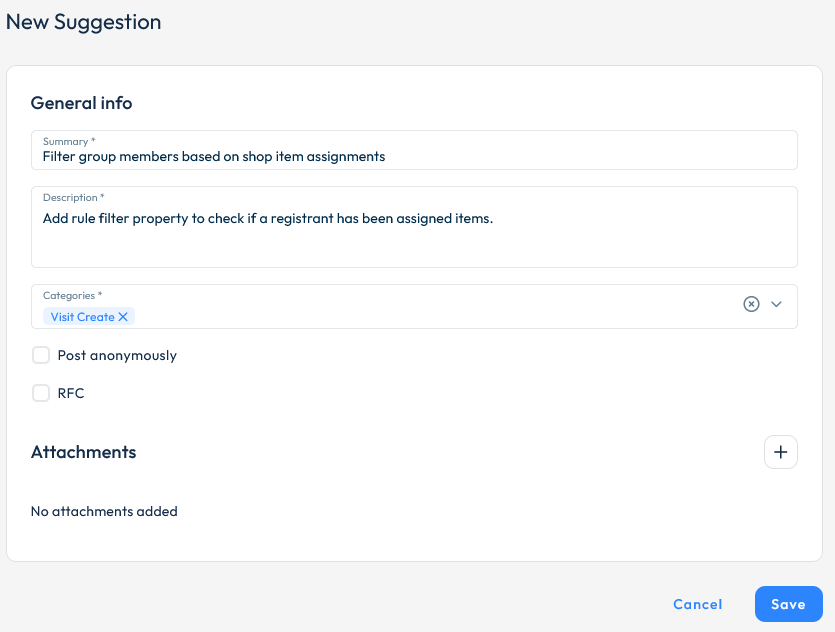
To add a suggestion, follow these steps:
- Select +Add.
- Enter a summary (mandatory).
- Fill in a brief description of the suggestion explaining how it would work and how it could benefit users(mandatory).
- Select product categories affected by your suggestion (Visit Create, Connect, API, etc.)
- Tick the ‘Post anonimously’ checkbox if you would like to keep your name private in the Suggestions Board.
- Add attachments if available.
- Select Save.
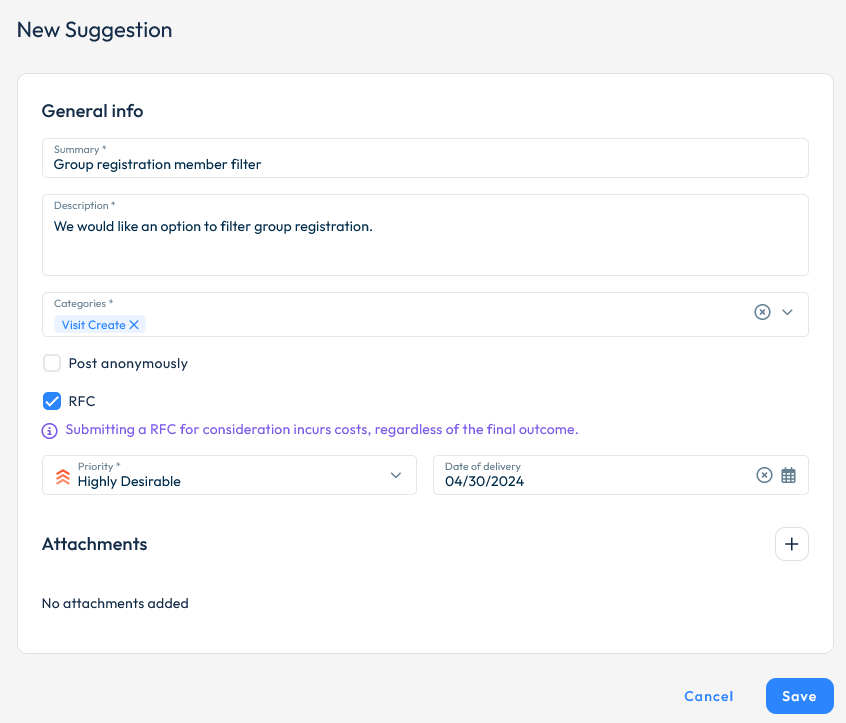
Suggestions can be converted to RFCs (requests for change) if desired (note that this will incur additional costs – please contact your account manager for more details). You will need to have the Request for change permission enabled to be able to convert suggestions and submit RFCs.
To convert a suggestion into an RFC, thick the corresponding checkbox, then select the level of priority from the drop-down below, then enter a desired delivery date.
Enable two-factor authentication
Two-factor authentication (2FA) provides improved security for Visit Create accounts. If 2FA is enabled, you will need to enter your password, and then a one-time verification code when logging into Visit Create. Authentication codes are obtained from authenticator apps installed on your mobile device, email or SMS.
It is disabled by default, but the person responsible with Accounts can choose to enable it for each individual role.
Users can also enable two-factor authentication from their Account details page:
- Select Set up two-factor authentication.
- Read the instructions in the Introduction, then click Continue.
- Select the preferred authentication method, then click Continue.
- Select Close.
View event access
Users with the Accounts permission can choose to allow access only to specific events or portfolio(s) of events within their organisation for certain users.
Under Account details, there is an Access all events checkbox. When this is ticked, it means that the user has access to all events within the organisation.
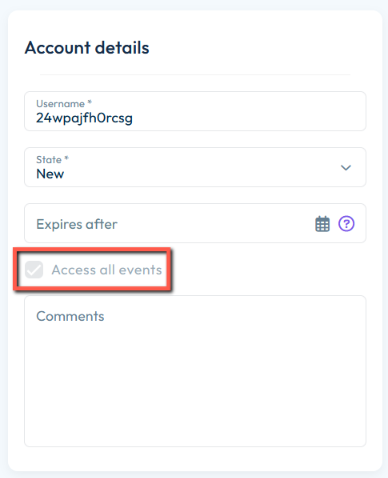
When you uncheck this box, two other fields will be displayed below, where you can select one or multiple of the existing portfolios and/or events to which this user will have access:
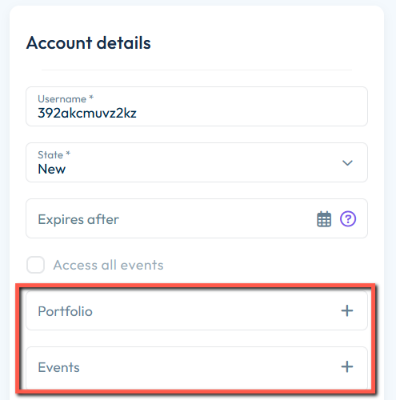
This means that either a list of the available events or portfolios, or an Access all events checkbox will be visible in the Account details section.
Manage other accounts
Users with the Accounts permission can view and edit other people’s accounts on the Accounts section in Visit Create.
You can access Accounts:
- In Visit Create, select Organisation. This opens a dropdown.
- Select Accounts.
You also have the option to Export all accounts to an Excel or PDF file.
Create a new user account
- On the Accounts page, select Add.
- Fill out the new user’s personal details and account details.
- Select the event(s) which your new user can access, or select the Access all events checkbox, if you wish to grant them access to all events within the organisation.
- Select the account role(s) by clicking the + (Add) button. Below you will see a list of permissions for the selected role.
- Select Save.
Resend the activation email
New users receive an email with an activation link. If the link expires before the user clicks it, you can resend the email:
- On the Accounts page, find the user’s account in the list.
- Click the user account once to select it.
- Select Send activation.
- Check that the user’s email address is correct, then select Send email.
Send a reset password email
If a user forgets their password, they can normally reset it themselves using the Forgot password link on the login page. This relies on them remembering and having access to their email account. If they have lost their email account, you can help them regain access:
- On the Accounts page, find the user’s account in the list.
- Select Edit the account.
- Edit the email address.
- Select Save.
- Select Send reset password,
The user receives an email with a link they can click to reset their password.
In case there is suspicion of a security breach, users with Accounts permission can also choose to reset passwords of all accounts within the organization by selecting all Accounts in the list, and then Actions > Reset selected.
Deactivate an account
Deactivate an account when you want to remove user access, but do not want to delete the account.
- On the Accounts page, find the user’s account in the list.
- Select Edit.
- In the State dropdown, select Disabled.
- Select Save.
Accounts with no activity within the last 6 months will be automatically disabled.
You can also deactivate all or multiple accounts at once, by clicking their corresponding checkbox in the list and then Actions > Disable selected.