Visit Create allows you to create and manage events in multiple languages. You can use the Translations feature to translate the text that appears on your registration forms, questions, and emails. You can also add your own custom text and translations for each language you want to support. This way, you can offer a seamless and personalised experience for your visitors and partners from different regions and backgrounds.
In this page, you will learn how to create and manage translations in Visit Create.
Access from Homepage: Select your event > Event > Translations
Create’s Translations feature allows you to support multiple languages across your registration process (including forms and questions), and in your emails.
On the Translations page you can:
- View available translations.
- Add new translations.
- Enable, edit, clone and delete an existing translation.
Browse translations
Visit Create displays all available translations in alphabetical order. You can filter them using the Level dropdown. Select Event to view translations that are only available for the current event, or select Organisation to view translations that are available across your organisation.
Create a new translation
- Select + Add.
- Enter a name. Visit Create uses this name to display the translation, for example in the Translations list. Consider using the language name.
- Set the translation level. Event level items are available for use in the current event. Organisation level items are available for use across all events in the organisation.
- Select the language from the dropdown.
- Select Ok to save the translation and return to the Translations list.
By default, a new translation is disabled.
Add text to a translation
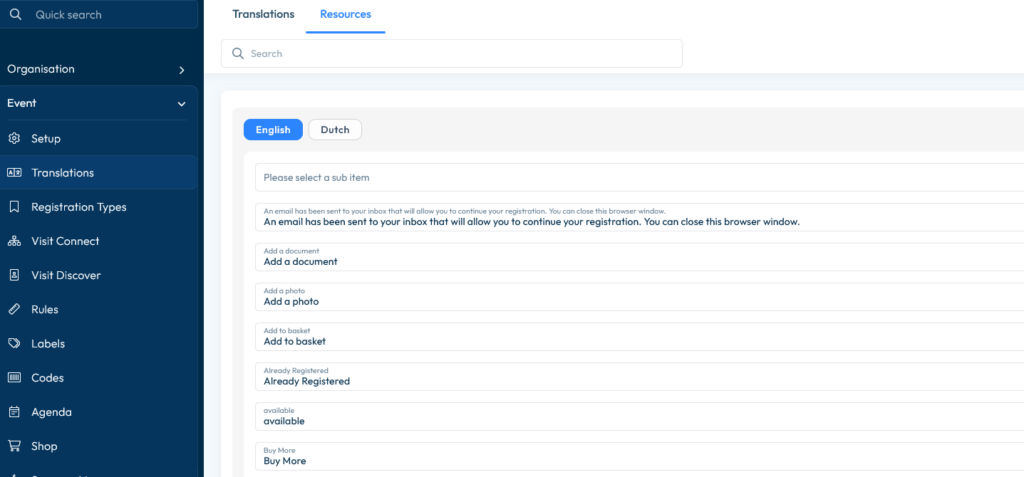
You can translate Create’s system text. For example, create a French version of help text such as “Add to basket” or error text such as “Already registered”.
- Select the Resources tab. Note that only the translations that are enabled will be editable.
- Select the tab for the translation you want to edit. For each text, write your translation. Alternatively, you can search and edit only specific text.
- Select Save.

Enable or disable a translation
In a new event, all translations are disabled by default. You need to enable the translations you want to use for this event.
- Hover over the target translation.
- Select the Open menu icon .
- Select Enable translation to make this translation available for use, or select Disable translation to turn it off for this event.
Edit translation settings
- Hover over the target translation.
- Select the Open menu icon .
- Select Edit.
- Change the translation settings.
- Select Ok to save
Clone a translation
Cloning a translation copies all settings and data associated with the translation, such as question translations. This allows you to reuse and customise an existing translation. For example, you want two versions of English – one formal, and one informal. You can create one version, then clone it to reuse it, meaning you do not need to start a completely new English translation.
- Hover over the target translation.
- Select the Open menu icon .
- Select Clone.
- Optional: provide a new name for the new translation.
- Select Ok.