Use the Agenda feature to create and assign activities for your event, such as seminars, workshops, courses, parties, etc. You can also define tracks to categorise your activities by themes or topics, such as event days, subjects, etc. Set up free or paid activities and add them to your registration forms and shop items.
In this page, you will learn how to create and manage agenda items and activities in Visit Create.
Access from Homepage: Select your event > Event > Agenda
This section allows you to manage agenda items and their display, free or paid activities within the event (such as seminars, workshops, courses, parties etc.), and define tracks to which activities can be attributed (event days, subjects, and so on).
Activities
In the Activities tab you can define paid or free activities happening within your event. You can later add those as shop items and include them in your registration forms to be sold to registrants.
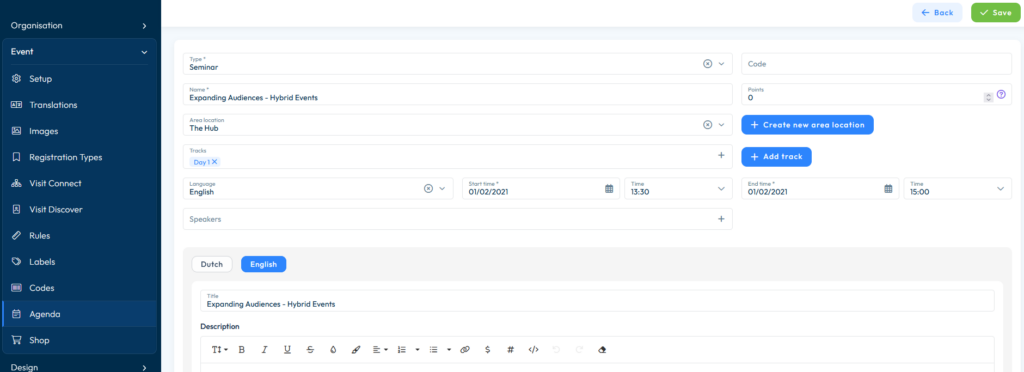
This table provides additional information about some of the fields in Activities.
| Setting | Description | Mandatory / Optional |
| Name | Enter a name for the activity (could be the title of the seminar or presentation for example). This will be visible in the Visit Create interface. Not visible to registrants. | Mandatory |
| Type | Select an activity type from the drop-down (workshop, seminar, presentation etc.). This field is mandatory. | Mandatory |
| Code | Enter an action code related to the activity. Refer to Add and manage action codes for more info on how to use codes. | Optional |
| Date | Select the date of the activity. | Mandatory |
| Start | Select the time when the activity starts. | Mandatory |
| End | Define the end time of the activity. | Mandatory |
| Access | Define the type of access to your activity. You can choose between Free (open access), Free (with sign-up), and Paid activities. | Mandatory |
| Capacity/Restrict Capacity | The default setting for Capacity is Unlimited, but depending on access type, area location, and rules, you can opt to limit the number of available seats. You can do so by checking the Restrict Capacity box and defining the number of seats available in the Capacity field. Note that this also implies having participants sign up for the activity, and thus you must select Free (with sign-up) or Paid access in the previous field. | |
| Language | Here you can define the language used for the activity (for example if a presentation will be conducted in French). | Optional |
| Points | Many industries (e.g. medicine, law, accounting) have professional education requirements under which practitioners must regularly attend conferences, seminars, etc., to retain their licences. This is often known as Continuing Professional Development (CPD), Continuing Professional Education (CPE), or Continuing Education (CE). Use this field to indicate how many points, units or credits registrants can earn by attending the activity. This number will be prescribed by the program recognised by your industry and region. | Optional |
| Labels | Assign predefined labels to activities to have them recommended to visitors based on their profile. See Labels (Beta) for more details on how labels work. | Optional |
| Tracks | Select the track which you want the activity to be associated with. Tracks are a way to categorise your event activities by themes or topics so that it’s easier for participants to select the ones they’re interested in. Choose one from the drop-down, or add a new track using the –New track– option. | Optional |
| Area location | Define a location of the activity. Either select a predefined one from the drop-down list, or add a new location using the –New area location— option. | Optional |
| Stream URL | Add an URL for your participants to watch the session. Activities in the Agenda that have a streaming URL associated, are marked with a ‘Live‘ label to improve visibility and access. If the activity is ongoing the label will turn red. Discover users can click the link to open and view the video. | |
| Translation | Select the corresponding language for each translation you wish to edit. See Add and manage Translations for more details. | Optional |
| Title | Enter a title for the activity as you wish your participants to see it. It will be displayed on the shop page in the registration form. Visible to registrants. | Optional |
| Summary | Add a brief summary of the activity. This will be visible to the registrants. | Optional |
| Description | Enter a description of the activity. This will be displayed on the shop page in the registration form. You have the option to edit the appearance of the text, and also insert URLs, special characters, dynamic fields, and HTML code. Visible to registrants. | Optional |
| Leaders | Add activity leaders with predefined roles (such as moderator, panelist, presenter, facilitator, guest). You can add their biography in the Visitor section in Service Centre. | Optional |
| Sponsors | Add one or multiple partners as sponsors for an activity, by selecting the Add sponsor button . Use the Drag item icon to change the order of the sponsors in the list. | |
| Share Attendees | Check this box if you want to enable this partner to download the list of attendees participating in the activity. | |
| Attachments | Add materials to support your activity, such as URLs, documents or videos that participants will be able to access. Enter a name for each attachment which will be visible to them in Visit Discover. |

Tracks
This section allows you to group activities by event days, subject, or any other criteria that suit your needs to help participants easily find the topics or times they’re interested in.

Use the +Add button to add a new track.
- Add a name for the track. This will be displayed in Visit Create and is not visible to registrants.
- Enter a description of the track. This is visible to registrants.
- Add a title. This is how the track will be displayed for registrants.
- Toggle between the different language buttons to enter name, description, and title for each available translation.
Select the Edit icon to make changes to existing tracks.
Click on the Delete icon if you wish to remove any of the tracks.
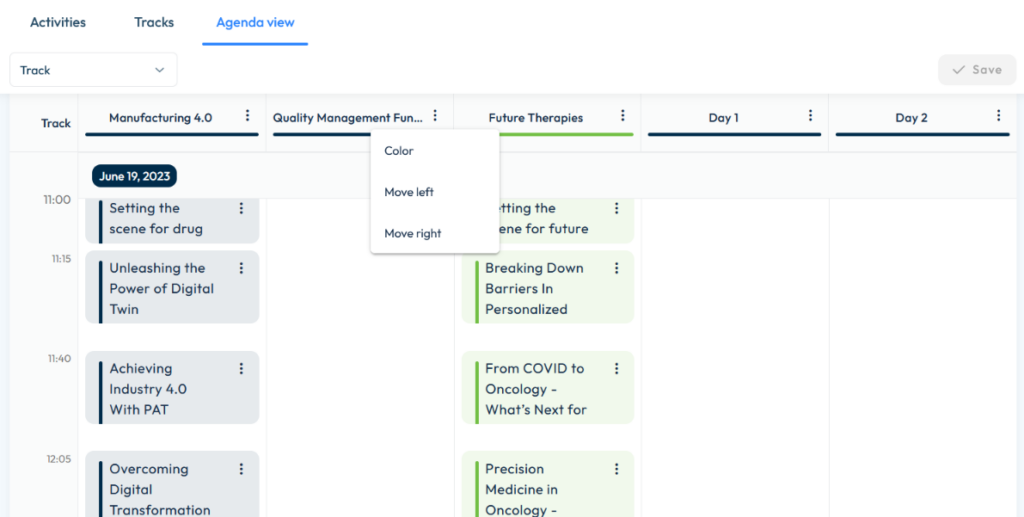
Agenda view
In this tab, you can view and sort agenda items (activities) by track or location. You can assign a unique color to each track and location, and rearrange their display position.