Scanpoints are QR codes that automatically appear in Visit Create and Visit Connect when the Content Management and Sharing module is activated. Partners can download and print their Scanpoints from Visit Connect, and they can embed them into their branded printed materials such as placards, posters and stands. To check whether the Content Management and Sharing module is active, please contact your account manager.
Benefits
- Efficiently deliver digital content to your connections without handling paper flyers, brochures etc.
- Environmentally friendly as all digital content is delivered through the scan of a QR code.
- Reduce printing and advertising costs by delivering everything digitally.
- Ability to personalise placards to attract more customers.
- Facilitate access to details about your products and services by instantly delivering digital content through the scan of a QR code.
- Enable trackability of who scanned what QR code.
Workflow
- Agree upon Scanpoints use – Contact your account manager to discuss this.
- Upload Digital Content – Upload your own event digital content. You can upload partner content as well.
- Inform exhibitors – Send the relevant email template to tell exhibitors how they can upload their own company profile and product-related content.
- Inform visitors – Use the #link_visitor# dynamic field in an email to visitors to allow them to scan Visit Scanpoints and access Visit Discover.
Content type
The Event Content tab gives you the ability to make event or organisational information available around the location. There are 2 types of content for partners:
- Event content: This is event-related information. Organisers can create and manage event content in Visit Create.
- Partner content: Visit Create generates a digital partner content record every time a partner is added. You cannot manually add partner content groups, but partners can add and manage their content using Visit Connect. Partner content can be company-related or product-related.
See Manage Content for more information on how to add and import event and partner content.
Digital Content via Scanpoints: Prepare for on-site
- You can export the Scanpoint as an image and integrate it in your custom designs (e.g., placards, banners, walls etc.)
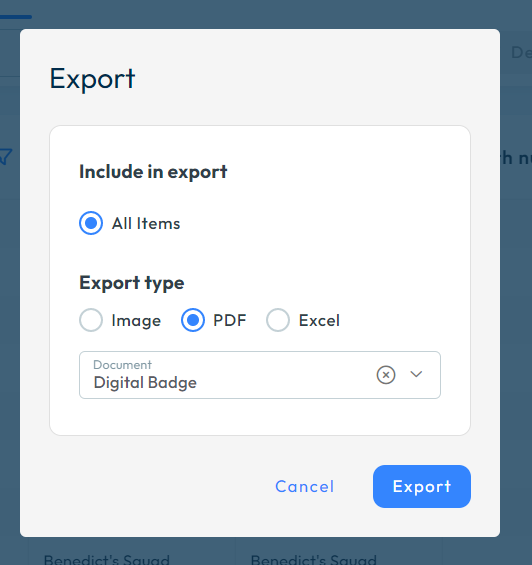
- You can export the Scanpoint as a PDF file that has a general template branded with the Visit logos or you can create your own in Document Designer and export the PDF using the custom template.
- You can achieve the above in Visit Create by accessing DESIGN, click on Digital Content, then on Export, choose the export type (image, PDF or Excel) and click Export. For PDF’s you have the option to use the Document drop-down to select a custom template or leave it blank to use the general template.

Guidelines
✓ Leave a border space around your Scanpoint
Always leave a space between your Scanpoint and the content or design around it. The Scanpoint should always stand alone on the background and the foreground should not touch other elements. It is important for QR code scanner apps to detect the corner elements as standalone objects.
✓ Don’t print or display your code too small
When displaying or printing your Scanpoint we recommend giving your code a size of at least 2×2 cm (0.8×0.8 inch).
✓ Don’t put them too close together
There are instances when you may need to place QR codes next to each other. However, keep in mind that printing multiple codes close to each other or even placing QR codes next to barcodes can lead to accidentally scanning the wrong one.
✓ Smoothness or shine of the surface
Be wary of choosing material that reflects too much light or distorts the image and competes with the scannability of your QR code.
✓ Keep Scanpoints within reach
Scanpoints should be reasonably placed so that people can easily scan it (not on the ceiling, at great distance from them etc.)
✓ Give a reason to scan by indicating what users should get upon scanning a Scanpoint.
✓ Don’t forget to test your Scanpoint with different devices and apps.