As you prepare for your event, crafting a seamless registration process for your participants is vital. Visit Create’s Forms is a tool designed to assist you in building and tailoring registration forms that suit the specific needs and structure of your event. You can add and modify questions, structure pages, and create multiple forms for different audience segments or event phases.
In this section, we will guide you through a systematic approach to designing and setting up forms. From creating new forms to cloning existing ones for efficiency, and configuring various form settings to control the registration dynamics, each step is simplified here. Understanding and using these settings will enable you to shape a user-friendly registration process, enhancing the overall user experience right from the start.
Design and set up a form
You may find it helpful to work through the steps in order:
You can also create questions and pages while setting up a form.
An event can have multiple registration forms.
Access from Homepage: Select your event > Form > Forms
Create a new form
- Select + Add to create a new empty form.
- Enter a name for the form.
- Select the Default registration type. To create a custom registration type, refer to Add and manage registration types.
- Select Save to create the form. The form editor opens in a new tab.
Edit a form
Access from Homepage: Select your event > Form > Forms
- Hover over the form you want to edit.
- Select Edit.
- Change the form settings. Refer to Create a new form for more information about the settings.
- Select Save.
Clone a form
Access from Homepage: Select your event > Form > Forms
- Hover over the form you want to copy.
- Select Clone form .
- Enter a name for the new form.
- Select Save
Configure form settings
Your form settings control basic form behaviour, such as payment mode and registration type.
Access from Homepage: Select your event > Form > Forms > Add a new form or Edit an existing form.
Configure settings
- Select Form settings
- Configure the following form settings:
| Setting | Description |
|---|---|
| Form name | The name Visit Create uses to display the form in the Visit Create UI. |
| Default registration type | Refer to Add and manage registration types for more information. |
| Dedupe mode | Select whether deduplication should be Off, on at Event level, or on at Organisation level. Event level checks the registrant email against other emails for this event. Organisation level checks the registrant email against emails at all events for the organisation. |
| PSP mode | Select Test or Live. Leave it as Test while previewing and testing the form. Once Live, Visit Create will process payments. |
| Default country | This country is pre-selected when the registrant is asked for their address. |
| Link to document | Link to any document you have uploaded. This is usually a voucher or badge. Once you have linked a document, you can use it in the confirmation email with the #link_document# field. The document is attached to the email. If you do not link a document, Visit Create attaches your default document. Refer to Add and configure documents for more information. |
| Valid until | By default, Visit Create makes forms available until the end date of the event. Use this field to create a custom form expiry date. |
| Maximum group registrants | Set the maximum number of group registrations permitted for the form. Visit Create allows a maximum of 10. For more information on group registration, refer to Enable group registration. |
| Maximum form registrations | Enter the maximum number of registrations allowed via this form. If the maximum is reached the default message displayed to anyone who tries to register is: “Sorry, this form can no longer be used to register for #event_name#. Please contact “#event_email# for help.” |
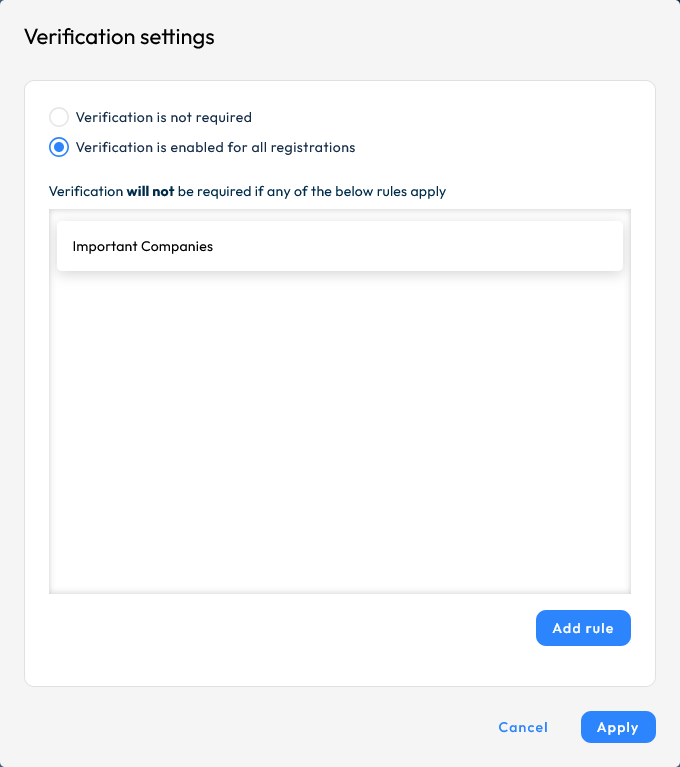
| Enable registrant verification | Select this option to manually verify all registrations. |
| reCaptcha Mode | Turning on reCaptcha can prevent spam. It can be set to Always on, Automatic, or Always off. When set to Automatic, Visit Create will enable reCaptcha based on the number of attempts using an advanced risk analysis engine. |
| Allow registration type overwrites | Allow registration type overwrites when registrants reopen the form. |
- Select an Edit button to open a modal for the following options:
| Setting | Description |
|---|---|
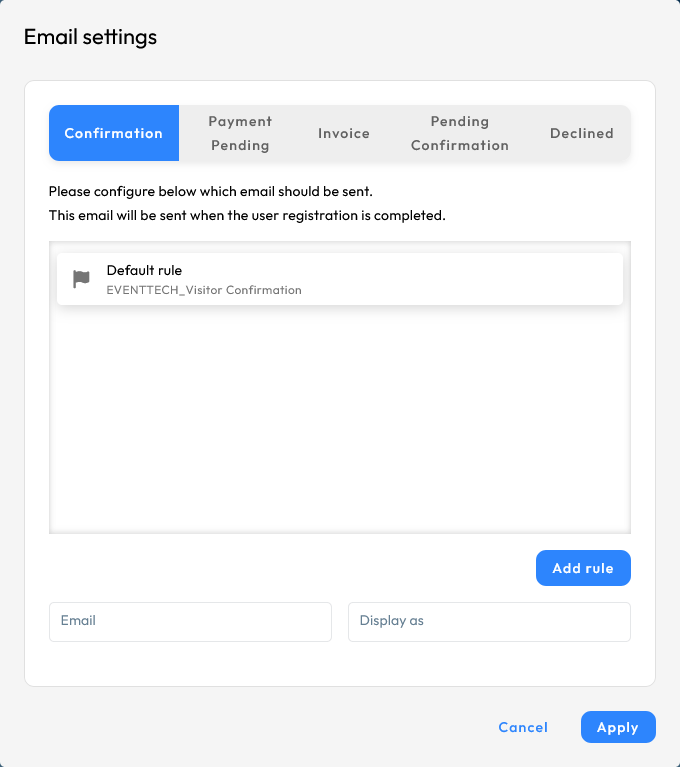
| Email settings | Select emails to send when registration is confirmed, when payment is pending, and to send an invoice when payment completes. Refer to Create email templates for information on designing your emails. Optional: add email rules. 1.Set a default email. The Set email button changes to the Add rule button. 2.Select Add rule. The Email rule modal opens. 3.Enter the rule types and conditions. There are two types of rule: -The rule applies when at least one condition is met. -The rule applies when all the conditions are met. 4.Select an email template to use with this rule. Select None if you do not want to send an email when the rule conditions are met. 5.Select Save. |
| Links and translations | By default, Visit Create enables all event translations. To disable a translation for the form, hover over it and select Disable translation . |
| Edit stylesheet | Add custom CSS to your form. |
| Edit JavaScript | Add custom scripts to your form. For example, add an analytics tracking snippet. |
Embedding forms as a widget
You can choose to embed Visit Forms into your own website as a widget.
To enable this, you must select the Edit Widget settings button in the form editor and tick the Allow the form to be embedded as a widget checkbox, enter the URL where the widget will be embedded, then copy the script into the box below and paste it into your website.
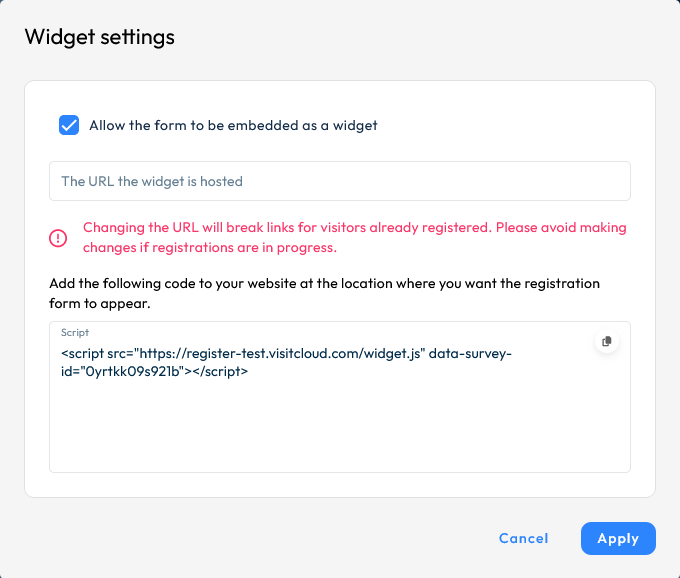
Please note the following:
- When using the widget form you are responsible for hosting the registration website. In case the website is down, the registration form will also be unavailable.
- Be careful when using JavaScript or CSS with the form widget as this can cause errors. Visit does not offer support for JavaScript/CSS in this case.
- Don’t make any changes to URLs where the widget is hosted after registration links have been distributed! This will break the links for visitors who have already registered.
When using embedded widgets, you have the option to skip the welcome page, taking registrants directly into the registration form.
In order to do that, you must insert the data-skip-welcome-page=”true” parameter into the script:
<script src=”widget.js” data-survey-id=”your_form_id_here” data-skip-welcome-page=”true”></script>Customise form theme
Access from Homepage: Select your event > Form > Forms > Add a new form or Edit an existing form
The form theme controls the form’s look and feel.
Customise the theme
- Select Theme .
- Choose an existing theme from the Theme dropdown, or select Add new theme to create a new one.
- Optional: you can base your new theme on an existing theme. Select the existing theme in the Based on dropdown in the Add new theme modal. This will copy the settings of the existing theme into your new theme.
- Modify your theme colours and fonts using the colour pickers and font menus.
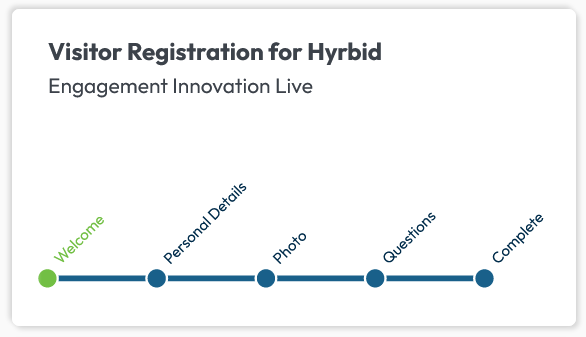
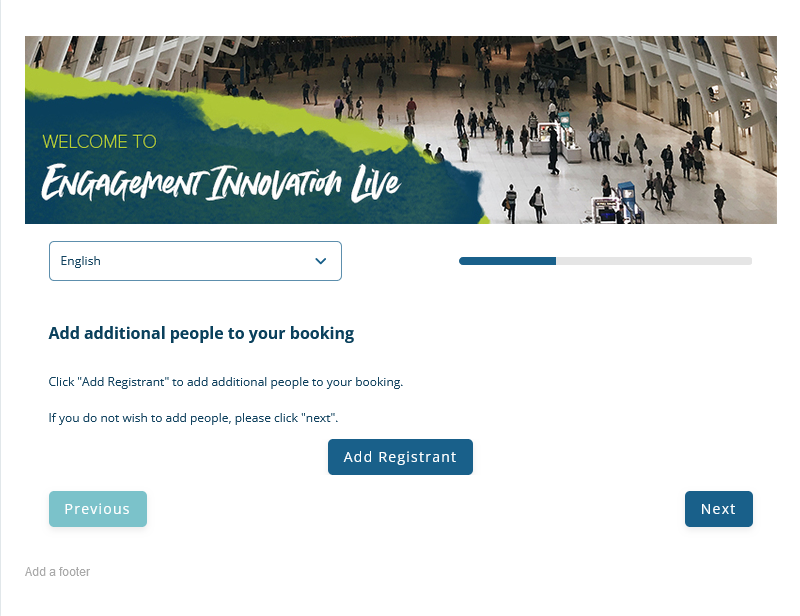
Edit the welcome page
The welcome page is the first page registrants see when they open the form. You can configure the welcome message, and set custom text to display when the form is closed.
- Select the Welcome page in the form navigation:
- Select Current page settings .
- Select the text you want to edit by clicking on the text box on the right side of the screen.
- Enter your custom text. You have various formatting options using the menu in each text box, and you can also select Insert link to add an URL or Add field to add a dynamic field. In the header and footer sections you can also add images.
- Optional: select another translation and edit the text for that translation. For more information on enabling translations, refer to Add and manage translations.
Add pages
Access from Homepage: Select your event > Form > Forms > Add a new form or Edit an existing form.
A new form has a welcome page and a completion page. You can add more pages, such as a shop page. For information about pages provided by Visit Create, refer to Questions and pages. For details about shop pages and collecting addresses, refer to the Video Tutorials.
Add an existing page
- Select Page library
- Browse pages by level. You can select to see all pages, or pages from the organisation or event level.
- Hover over a page and select Add to add it to the form.
- Optional: change the page order in the form:
- Hover over the page in the form navigation:
- Small left and right arrows will appear.
- Select an arrow to move the page.
- Hover over the page in the form navigation:
Create a new page
- Select Page library .
- Select Add new page.
- Enter a page name.
- Select Save. The page appears in your form, ready for editing.
You can also create pages in the Pages interface. For more information, refer to Set up pages.
Create and add questions
Questions allow you to collect additional information from registrants.
Select your event > Form > Forms > Add a new form or Edit an existing form.
You can create and edit questions by:
- Creating questions using the Questions section of Visit Create. Refer to Add and Edit Questions for more information.
- Creating questions within the form.
You can add questions by:
- Adding a question display page. Refer to Add pages for more information.
- Adding a question to an existing page.
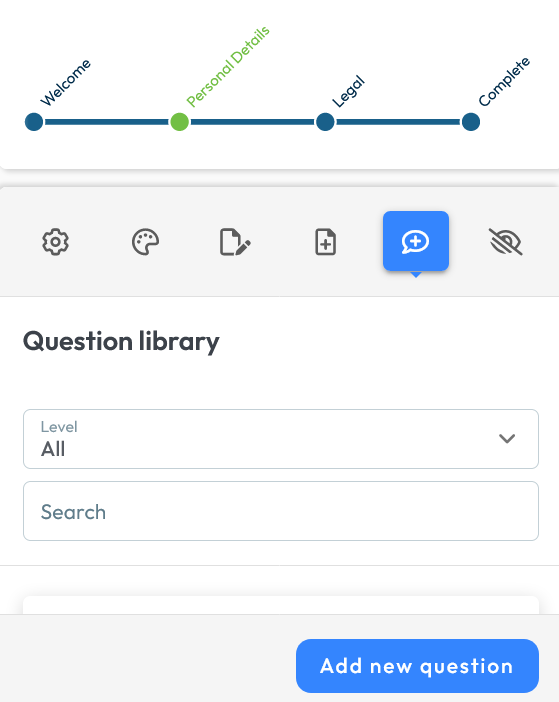
Add a question to an existing page
- Select the page from the form navigation:
- Select Question library.
- Browse questions by level. You can select to see all questions, or questions from the organisation or event level.
- Hover over a page and select Add to add it to the page.
Create a new question within the form
- Select the page from the form navigation:
- Select Question library .
- Select Add new question.
- Provide the following question settings into the right side of the screen:
| Setting | Description |
|---|---|
| Type question name | The name Visit Create uses to display the question, for example on the questions list and the event setup’s Visitor questions tab. |
| Question position | Controls how Visit Create positions the question on registration forms. |
| Question type | Controls the answer type. The options are: Open: you must select the type of answer – choose between Label, Small input answer or Large input answer. Dropdown, Radio or Checkbox – Visit Create asks you to define an answer list. Use Show question if this answer is selected to show further questions if the registrant selects this answer from the list. |
| Make it mandatory | Select this to require the registrant to answer. |
- Select Save.
Enable group registration
Group registration allows users to add multiple registrants on one registration form. For access to group registration settings, select Form from your homepage.
Access from homepage: Select your event > Form > Forms > Add a new form or Edit an existing form
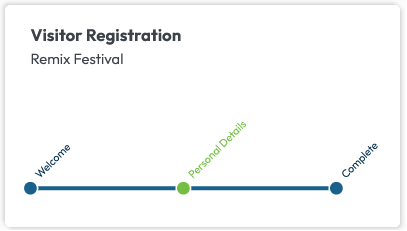
When you open the form (added or edited), make sure you have at least one page in between the Welcome and Complete ones.
Opening the page, click on Current Page Settings tab and choose one option from the Group Registration Mode dropdown:
- The page is for the main registrant
- The page is for the group registrant(s)
- The page is for the main and group registrant(s)
The page added should collect registrant details either for the main registrant, for the group registrants or for both main and group registrants, the main difference being the Add Registrant button in the front of the page which enables gathering information for an entire group.
Once clicked on the Add Registrant button, you can fill in the information from the page. To continue adding group registrants once you have added the first one, you should click on the Add Registrant button from the top right corner of the page. This way, you will notice a tab with the name of each registrant at the top.
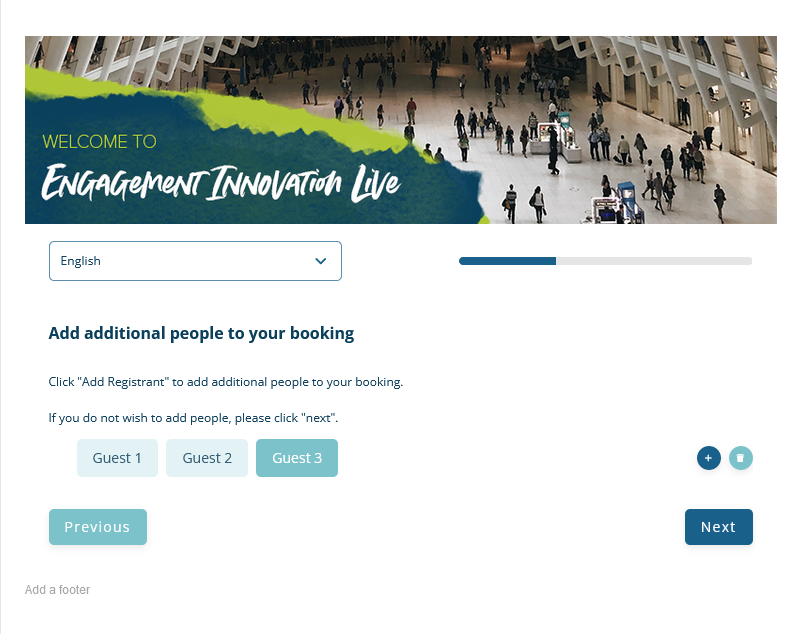
Only when you click on the Next button, you will be taken to the next page of the form. You can have certain pages available only for the main registrants, only for group registrants or for both, depending on the information you would like to collect during registration.
Save your changes before continuing.
Set up rules
You can use rules to show or hide certain pages or text, depending on the registrant’s details.
Access from Homepage: Select your event > Form > Forms > Add a new form or Edit an existing form
Show or hide a page
- Select the page from the form navigation:
- Select Rules. Visit Create displays a list of existing rules.
- Click an existing rule once to enable it and set it to show the current page if the rule conditions are met. Click the rule again to set it to hide the current page if the rule conditions are met.
Show or hide conditional text
- Enter the text.
- Select the text by highlighting it. An inline text formatting menu appears.
- Select Add condition.
- Select a rule to apply.
- Choose whether to hide or show the text.
- Select Apply
Create a new rule
- Select the page from the form navigation:
- Select Add new rule.
- Enter a name for the rule.
- Enter the rule types and conditions. There are two types of rules:
- The rule applies when at least one condition is met.
- The rule applies when all the conditions are met.
Conditional Verification Rules
Registrant verification can be triggered based on registration data using Visitor Rules. You have the option to setup required verification per each form, only if specific conditions are met.
Email Logic
The email logic has been updated to match new verification flow:
- Confirmation email – sent when a registrant is fully registered
- Payment Pending email – sent when the payment is pending – e.g. for bank transfers
- Invoice – sent after the payment has been received
- Pending Confirmation email – sent to those waiting for confirmation approval
- Declined email -sent when the user registration is declined.
Set answer count limits
Answer count limits allow you to control how many registrants can answer a multi-choice question. When the limit is reached, Visit Create disables the question for any future registrants.
This can be useful if you use multi-choice questions to allow registrants to choose items, such as a free magazine, or events, such as a meeting with limited space.
Access from Homepage: Select your event > Form > Forms > Answer count limits
To set an answer count limit:
- Add the multi-choice question to your registration form. It will automatically appear on the Answer count limits page.
- On the Answer count limits page, select the question. Visit Create displays the multi-choice answer options.
- Hover over the answer you want to limit.
- Select Edit.
- Enter the total available.
- Select Save.