Visit Discover is a digital portal that allows your visitors to register for your event, access their digital badge, view and contact exhibitors, connect with other attendees, and collect and review digital content. Visit Discover also provides visitors with recommendations based on their interests and preferences.
As an organiser, you need to configure Visit Discover for your event. You can choose the registration form, digital badge, email templates, and other custom options for your portal. You can also customise the theme and appearance of your portal to match your event branding and style.
In this page, you will learn how to access and manage the Visit Discover settings for your event, so you can provide your visitors with a convenient and engaging digital portal.
Access from Homepage: Select your event > Event > Visit Discover
Accessing Discover
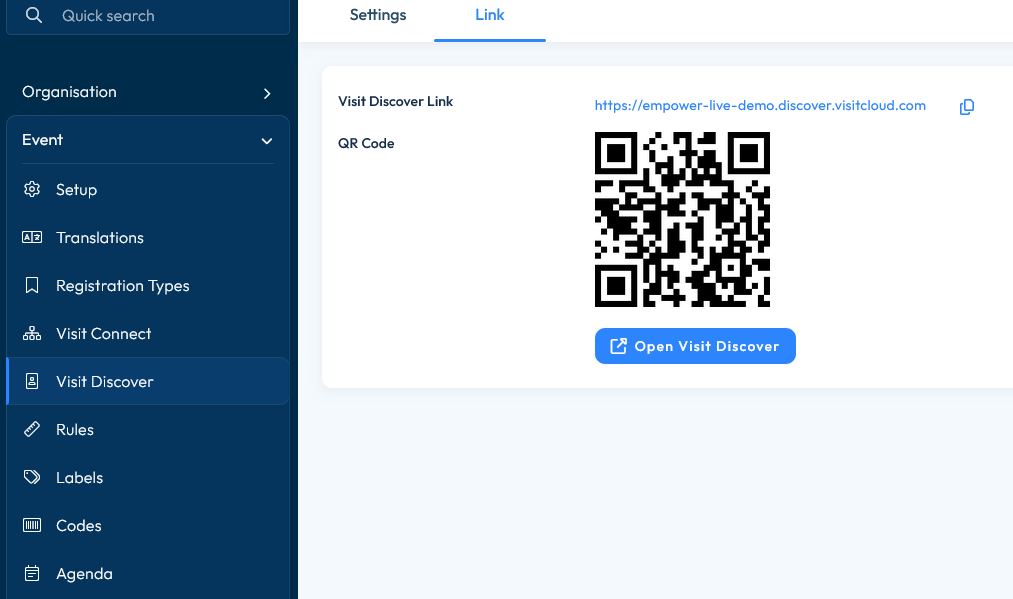
In the Link tab, you have three ways of accessing the Visit Discover:
- Visit Discover Link which can be copied to clipboard and shared.
- QR code that can be scanned using a smartphone or tablet, which opens the Visit Discover on the mobile device.
- Open Visit Discover button which opens the Visit Discover in a separate tab.
When you first access the Visit Discover, you will see the portal exactly as your visitors see it:
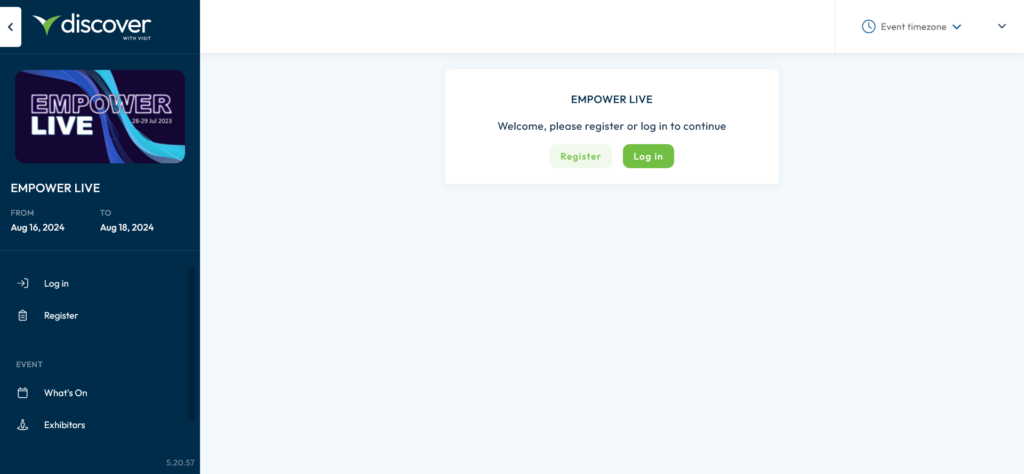
It will display the registration form and a left-side menu containing the What’s On, Exhibitors, and Products sections (if enabled).
Settings
In the Settings tab you can:
- Upload a logo to be displayed within the app dashboard.
- Choose the registration form to be displayed in the portal. Users will need to fill this form when first accessing Visit Discover.
- Select the shop form to be displayed in the What’s on section. This form is linked to paid activities/seminars that attendees can register for.
- Choose the digital badge to be linked to Visit Discover.
- Choose the content email template to be sent to visitors.
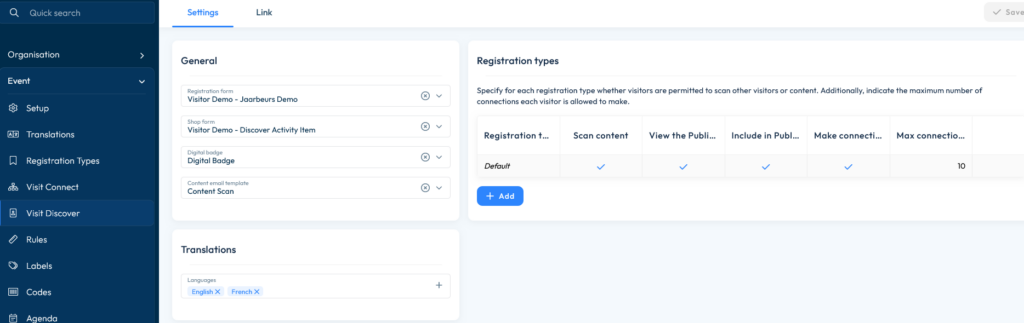
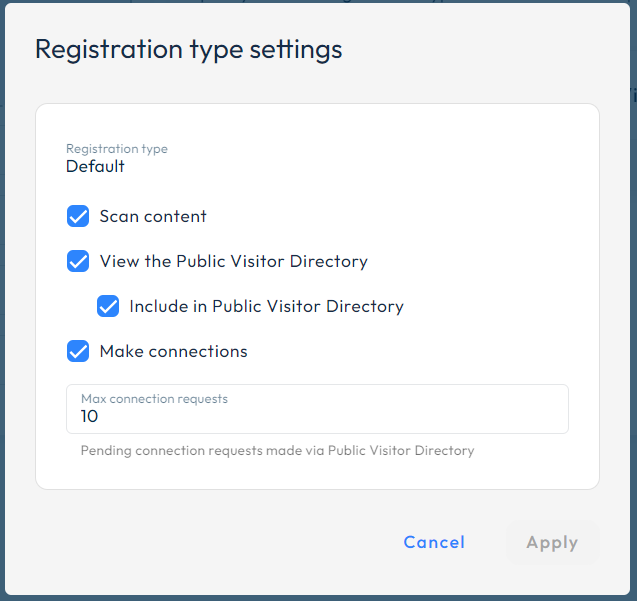
Enable specific Registration Type settings:
- Scan Content
- View Public Visitor Directory
- Include in Public Visitor Directory – can only be checked if View the Public Visitor directory is checked.
- Make Connections
- Maximum pending Connection Requests
- Unless set up differently by the user, the system will choose the default registration type.
Theme
You can change the appearance of your Discover app by accessing Design > Theme.
This is where you can choose the app colors, add a logo for your event, and choose tiles, their colors and layout.
Note that colors must be defined in advance in the Color palette section.
You can either choose to keep the System Default theme, or you can create multiple personalised ones, by selecting New theme from the drop-down.
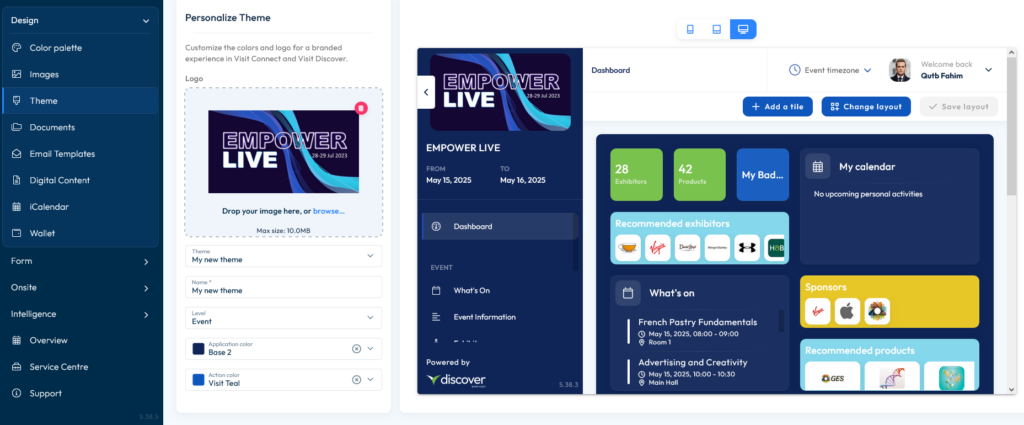
The Theme tab allows you to:
- Select Organisation, Event or System Default Theme
- Enter a name for your theme
- Select whether the theme should be available at Event or Organisation Level
- Click the Save button once you are done.
You can also delete the themes you have created by clicking the Remove button. Note that if all custom themes are removed, the theme setting will return to System Default.