Visit Connect is a lead generation tool that supports exhibitors (named partners in Visit Create) at events. It allows them to collect and manage leads (“connections” in Visit Connect and Create), share digital content, schedule and conduct meetings, invite and register guests, access event guidelines and tasks, and more. Visit Connect also provides partners with insights on their performance.
As an organiser, you need to configure Visit Connect for your partners. You can enable or disable different features for each partner type, customise the welcome text and questions list, and set up single sign-on. In this page, you will learn how to access and manage the Visit Connect settings for your event. By using these features, you can provide your partners with a powerful and user-friendly lead generation tool.
Access from homepage: Select your event > Event > Visit Connect
By opening up Visit Connect, you will be able to go through 6 main tabs:
- Settings;
- Texts;
- Questions;
- Login (SSO/Single Sign on)
- Manuals
- Tasks

Settings
From Settings, you can enable Visit Connect features for each partner type added – you will notice a separate tab for each Partner Type:
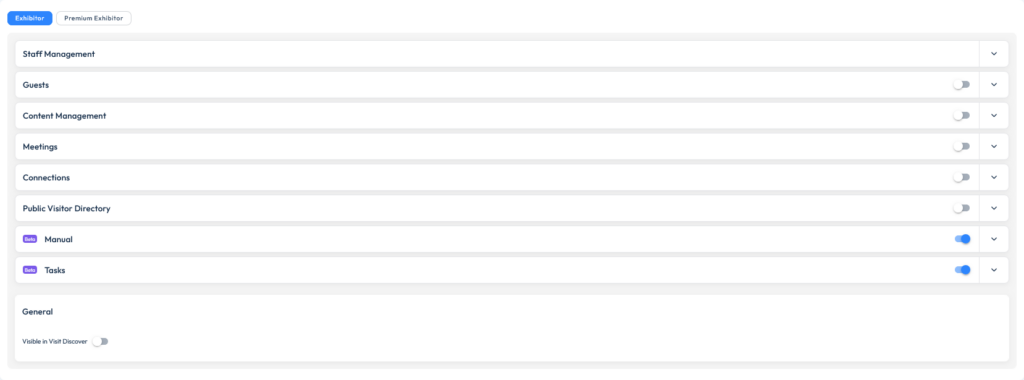
Each partner type has 9 features (Staff Management, Guests, Content Management, Meetings, Connections, Public Visitor Directory, Manual (Beta), Tasks (Beta), and General – Visible in Visit Discover) that need to be enabled depending on the specific requirements of the event:
- Staff
- Guests
- Content Management
- Meetings
- Connections
- Public Visitor Directory
- Manual
- Tasks
- General – Visible in Visit Discover
Visit Connect Features
| Visit Connect Features | Description | Sub-features | |
| Staff | By enabling Staff option, you enable this partner type to invite and/or register their staff through Visit Connect. | Add staff setting – defines how admins can add their team members: invite, register or both options. See details below. Other options: limit the number of badges for each registrant, enable access to digital badges, enable import of staff, configure a shop item for badge orders, allow partners to print and email their staff vouchers, prefill the staff registration form with the partner’s company name, prefill the staff registration form with the partner’s company address, select a Payment Service Provider – you can either choose Test or Live depending on the status of your event. | |
| Guests | By enabling the Guests checkbox, an icon will appear in the Visit Connect menu. | Allow partners to make use of/create a personalized registration form – based on the registration form selected; Partners can create their own URLs to measure the success of a particular campaign. Allow partners to view their Action Codes – partners see the list of action codes created by the organizer (discount codes etc.). Allow partners to see guests that registered through their own registration link, or guests that registered using an action code of that partner, and export their guests’ information. Allow partners to customize the registration form – partners can add a logo and text which appear before starting the registration process created by the organizer. | |
| Content Management | Allows the selected partner type to add and manage digital Content. | By checking the Content Management checkbox, partners can see the Digital Content tab in their Visit Connect menu and manage their company and product information. You can choose to limit the maximum number of products that a partner can add. If you leave the Max products field blank, they will be allowed to add unlimited products. | |
| Meetings | Allows selected partner type to see and manage their meetings. | Allows exhibitors and attendees to engage in meetings and interact via chat and messaging. | |
| Connections | Allows partners to scan and manage leads. | You can automatically create a scan licence for each partner type and set up unlimited activations or a maximum activation count. The number of available scan licences determines the number of devices that can be used for lead capture. You also have the option to limit the number of questions partners can set up for their connections. When you leave the Max questions field blank, they will be able to add unlimited questions. Refer to Visit Connect User Guide for more information on how exhibitors can use the app. | |
| Public Visitor Directory | Enables partners to view attendees who have opted in to making themselves visible to the public. | When enabling public directory, partners will be able to view attendees who have opted in to making themselves visible. Enabling the chat setting allows partners to initiate conversations with these attendees. You can limit the number of pending chat messages made via the public visitor directory as a default per each partner type, but you can also set up a different number per each individual partner in the Service Centre settings. | |
| Manual | Enable manual pages visible to each exhibitor registration type. | The exhibitor manual itself consists of a list of pages containing information aimed at helping exhibitors to prepare for an event. Anything from general event information, maps & plans, health & safety guidelines, to marketing opportunities and updates and announcements can be included in the manual pages. Define which of the manual pages appear to each specific exhibitor type, and also the order that you want them to appear in. In order to access the Manuals feature, you must have the Events permission enabled. | |
| Tasks | Assign tasks for each exhibitor registration type. | A task is an action that you define as the organiser that an exhibitor can do before the event. Assign your tasks to each of your partner types. Different types of exhibitors can be given different tasks to do, much as they could see different manual pages. You must have the Tasks permission enabled (only assigned to Full Access users) to be able to view and handle exhibitor tasks. | |
| General – Visible in Visit Discover | The selected partner type is made visible in Visit Discover. | When this is enabled, visitors are able to see all the partners without the need to scan their Digital Content. |


Add staff setting
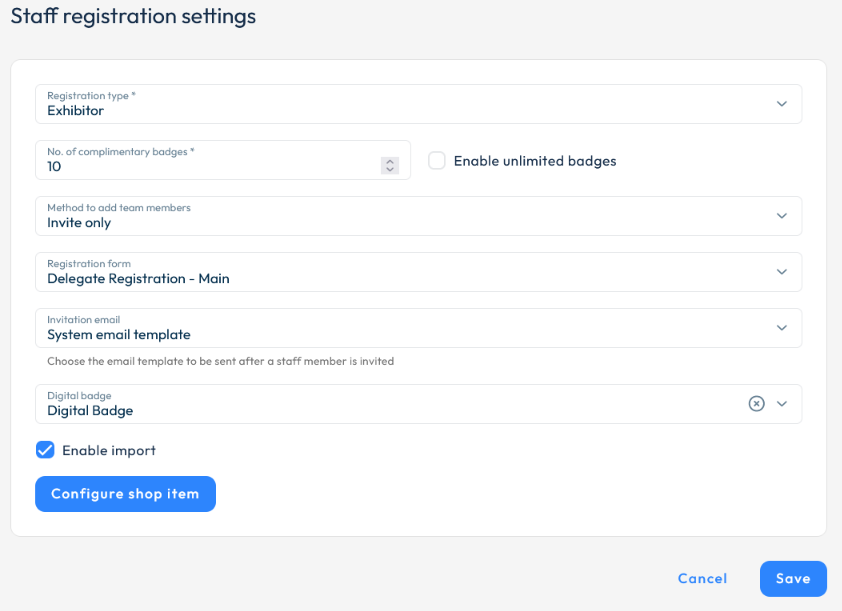
This setting enables you to select a registration type (from the pre-defined ones) for your partners’ staff, define the number of complimentary badges, choose whether or not they will have a digital badge, enable adding staff through import and configure a shop item for badge orders.
Most importantly, as an organiser, you decide how your partners can add their team members to Visit Connect. You can allow partner admins to add their staff through:
Invite only – Visit Connect admins send invite, and the invited team member must finish their registration. In this case, you must also select a registration form that the invited staff will use, and an invitation email template. You can choose a system or a custom template.
Register only – admins must complete registration for their staff. In this case, you must either select a registration form, or allow admins to register their staff through Visit Connect, without using a form, but you must define a confirmation email to be sent to registered staff members.

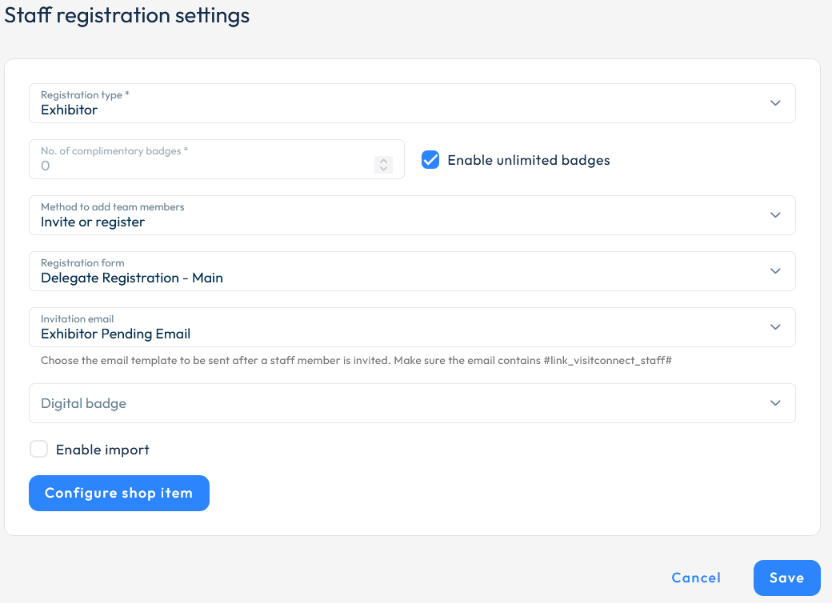
Invite or Register – admins can decide on whether they invite their staff, or finish the registration on their behalf.
In this scenario, you must define both a registration form and an invitation email template. Note that the email template must contain the #link_visitconnect_staff# dynamic field, which will insert the individual Visit Connect URL for each member.
Depending on the scenario, setting up a registration form, invitation, and/or confirmation emails may be mandatory, not necessary, or optional. You will find a simplified table here:
| Registration form | Invitation email | Confirmation email | |
| Invite only | Mandatory | Mandatory | Not needed |
| Register only | Optional | Not needed | Mandatory when no registration form is set |
| Invite or Register | Mandatory | Mandatory (system template or custom template) | Not needed |
New events have Invite only as a default option.
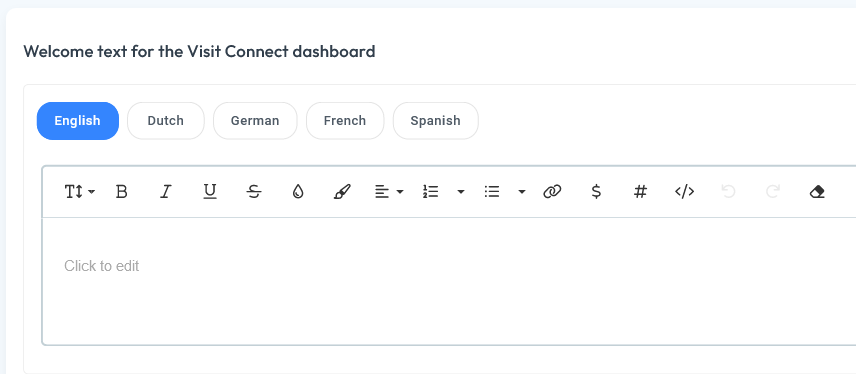
Texts
From this tab, you can customize the welcome text for Visit Connect. The partners will see the text on their dashboard. It can be set in 5 languages: Dutch, English, French, German, Spanish.
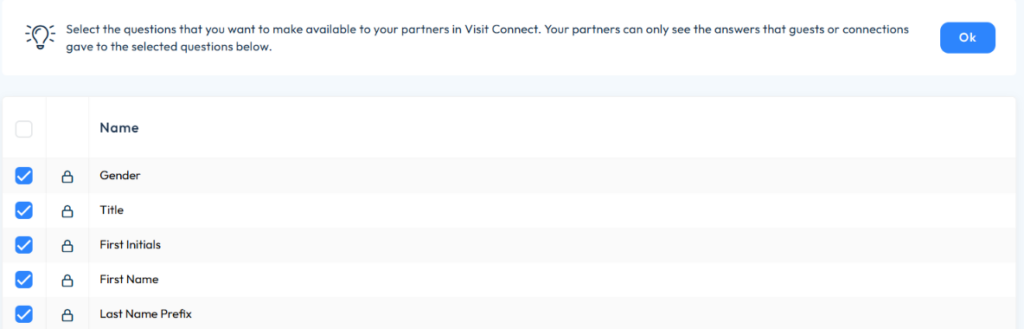
Questions List
In the registration process, you can customise your own set of questions. In the Question List tab, you can select the questions that will become available for all your partners – only the registrants’ answers will appear in Visit Connect.
You can choose which question answers to share with your partners (exhibitors). There are two types of questions you can share (see Add and Edit Questions for more details):
- System questions – Standard, pre-defined questions built into Visit Create. These are selected by default, but you can deselect any that you don’t want to share.
- Custom questions – Questions created specifically for your event or organisation. You can select these individually from the list.
Each question type is identified by a unique icon displayed next to its name:
System questions:
Event-level questions:

Organisation-level questions:

When exporting data, System question names will always appear as column headers. However, answer columns will only be populated for the questions you have chosen to share.
Exhibitors can view, enter, or edit answers to any shared questions directly within Visit Connect.
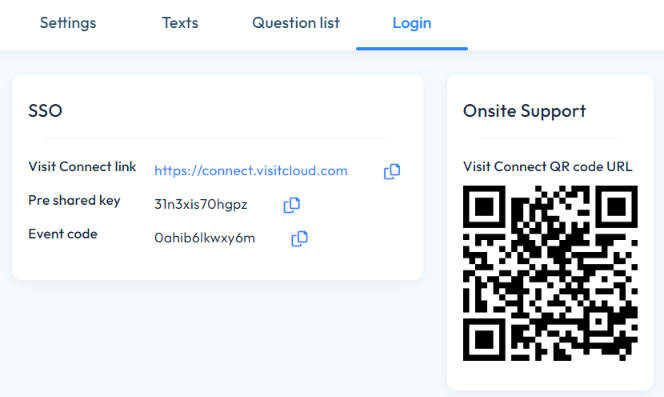
Login (Single Sign-on)
Login (Single Sign-on) simplifies the experience across integrations with 3rd parties.
It requires a one-time setup on the exhibitors’ portal server and placing a script that contains a pre-shared key and event code. In this manner, the Single Sign-on won’t require a double authentication when switching from an owned portal to Visit Connect.
The pre-shared key and event code are found here: Visit > Event > Visit Connect > Login
For more information about the setup on owned portals, follow one of these steps:
A. Review some sample PHP scripts as an example of understanding the type of script needed to be placed on the server.
B. Simulate a 3rd party integration here.
- Introduce the pre-shared key and event code from Visit Create > Event > Visit Connect > SSO.
- Type the Contact Reference which is found in Visit Create > Service Centre > Partners. Choose a partner and copy the Reference code.
- Click on Generate request.
Manuals
The exhibitor manual is a centralised, digital hub that compiles all the essential information an exhibitor needs to participate successfully in an event.
Designed to support both event organisers and exhibitors, it acts as a comprehensive onboarding and planning resource, helping ensure everyone is aligned and prepared. Exhibitor manuals bring together critical details – such as build-up and breakdown schedules, health and safety regulations, access instructions, ticketing processes, marketing opportunities, hospitality options, venue maps, important deadlines, preferred suppliers, and key contact information—into a single, easily accessible location.
For organisers, an exhibitor manual streamlines event management by reducing repetitive queries, aligning internal teams, and ensuring all stakeholders are working with up-to-date information. For exhibitors, it provides clarity, structure, and confidence, empowering them to plan efficiently, meet compliance requirements, and make the most of their presence at the event.
In Visit Create, manuals can consist of multiple manual pages containing various information.
To add a new manual page go to Event > Visit Connect > Manuals > Add
You can enable translations to display the manual pages in various languages (English, Dutch, French, German, Spanish, and Turkish).
All manual settings enabled in Create will be reflected in the partners’ Visit Connect account.
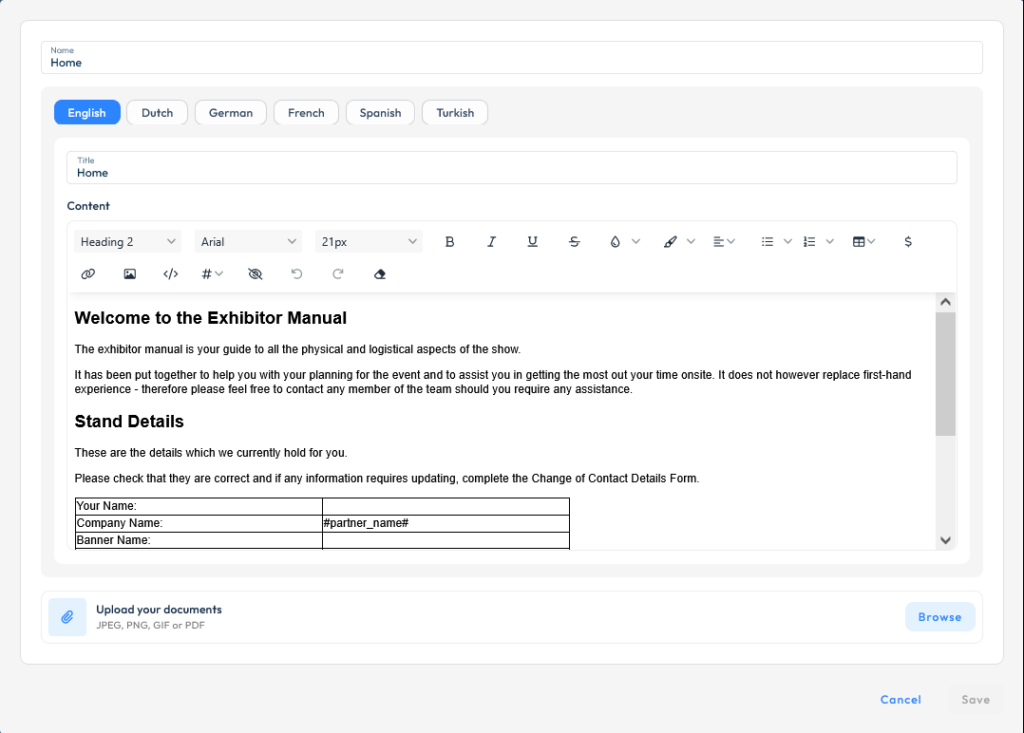
Each manual page has the following elements:
- Name: This is the name of the page in the Visit Create interface.
- Title: This is the name of the page in Visit Connect.
- Content: This is where you can add and edit the page content. Similar to the email editor, you can choose the text font, color and format, add tables, URLs, images, HTML code, dynamic merge fields and conditional text (text that is displayed based on partner rules).
- Upload your documents: Attach supporting files, such JPEG, PNG, GIF or PDFs.
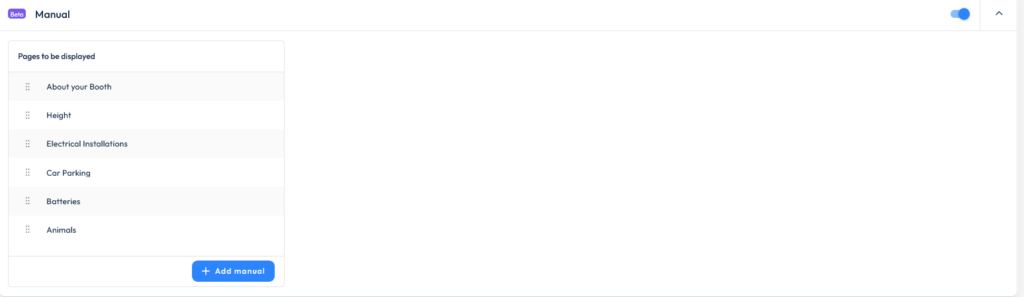
Once you’ve added all the manual pages, go to Event > Visit Connect > Settings to enable the manual, add pages and define the order in which the pages are displayed for each exhibitor type.
Note: Each exhibitor registration type has its own tab. You need to enable and configure the manual settings separately for each type you want to give access to the manual. Only registration types with a manual enabled will be able to view it.
Tasks
A task refers to a specific action or requirement that you can assign to exhibitors to ensure their booth and event presence are fully prepared and compliant before the event begins.
These tasks are managed through the platform’s Task management feature, which allows organisers to assign, track, and manage exhibitor responsibilities in a streamlined and efficient way. In order to view and manage exhibitor tasks, you will need to have the Tasks permission enabled (only assigned to Full Access users).
Exhibitors can access their Visit Connect account to view, complete, and mark off tasks independently. They will also need to have the Tasks permission for Connect users enabled in order to view their tasks. Tasks can include a wide range of activities, such as setting up booth components, preparing marketing materials, managing booth staff, and confirming access or logistics details.
Tasks can be optional or mandatory (required). You can also request review for each task, meaning that you as an organiser or someone from your team must review each exhibitor’s submission for this task.
To define tasks go to Event > Visit Connect > Tasks > Add
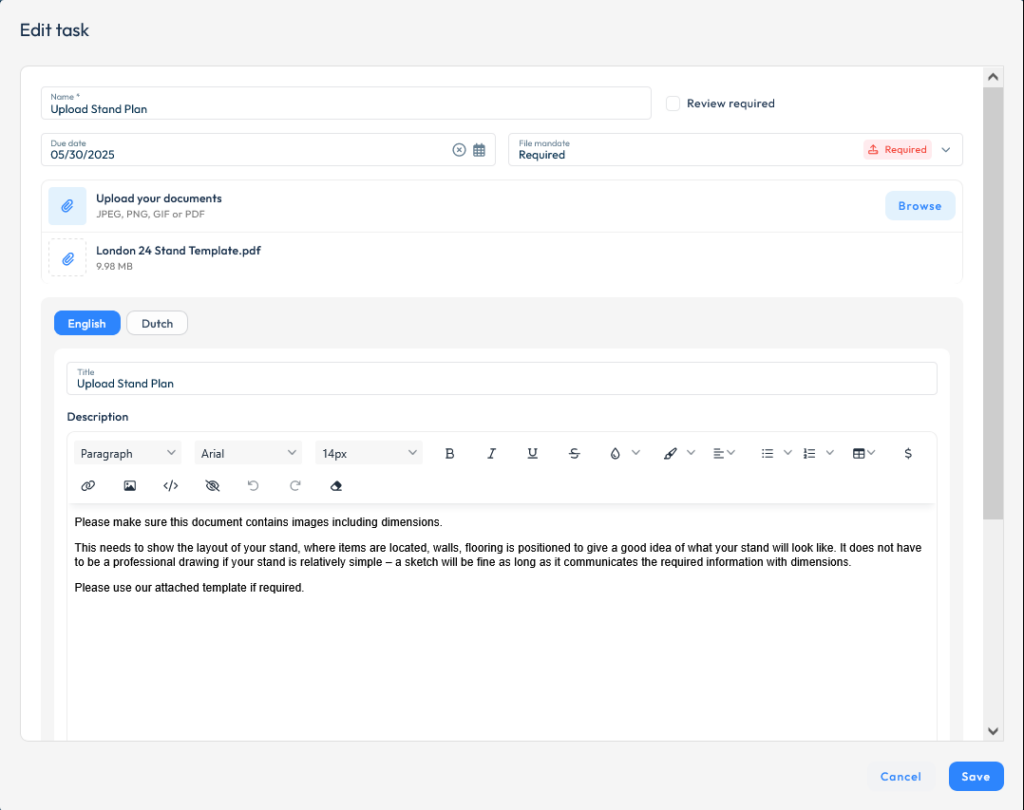
Tasks have the following elements:
- Name: This is how the task is displayed in the Create interface.
- Review required: Check this if you want to enable task review.
- Due date: Define the date by which the task must be submitted.
- File mandate: Choose if the task will be optional or required (mandatory).
- Upload files: Choose one of the documents previously uploaded in the Files section, or upload new files (images or PDFs).
- Translations: Define content for each enabled translation to display it in multiple languages.
- Title: How the task is displayed in the Visit Connect interface.
- Description: Enter details about the task. You can choose the text font, color and format, add tables, URLs, images, HTML code, dynamic merge fields and conditional text (text that is displayed based on partner rules).
- Questions: Add questions from your per-defined list that your exhibitors can answer.
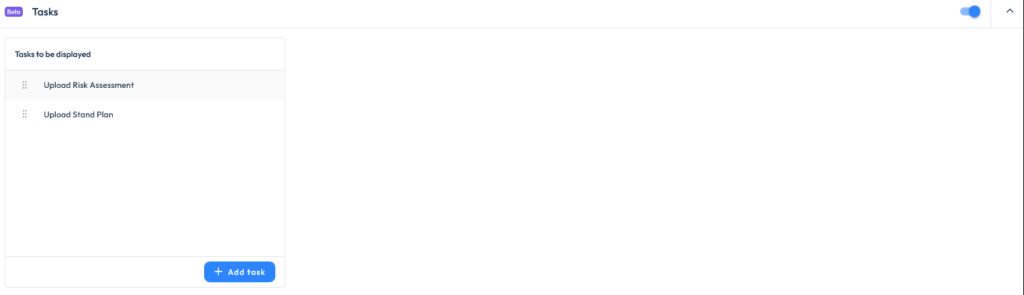
Similar to manual pages, you must go to Event > Visit Connect > Settings to enable and add tasks, and define the order in which they are displayed for each exhibitor type.
Note: Each exhibitor registration type has its own tab. You need to enable and configure the tasks settings separately for each type you want to give access to them. Only registration types with Tasks enabled will be able to view them.
Visit Connect API
You have the option to enable exhibitors to retrieve connections from Visit Connect via API, so they can integrate with their own systems. Permission to use this will be granted based on licences, similar to the scan & Touchpoint ones.
Please contact your account manager if you wish to enable this option for your event.
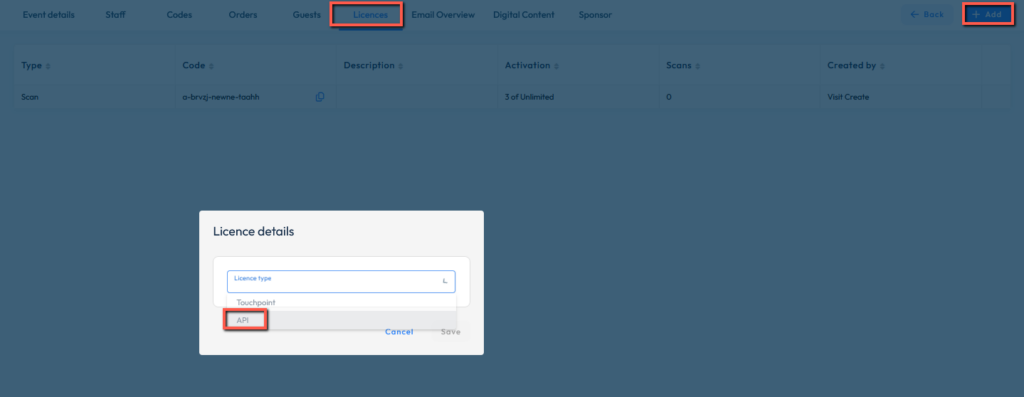
Licences can be added in Service Centre > Partners > Select partner > Licences > Add > Licence type – API
The license for the Connections API enables consuming applications to:
1. Fetch connections from Visit Connect into external systems, such as CRM platforms.
2. Scan attendee QR codes using exhibitors’ own hardware and to submit to the API to generate a connection and return the associated contact properties.
Valid scans submitted to the API are available under the Connections section of the Visit Connect user interface and are available for export to those users with the required permissions; in that respect they are no different to connections made by scanning with our own solutions.
Registered users may access the Visit Connect application at https://connect.visitcloud.com
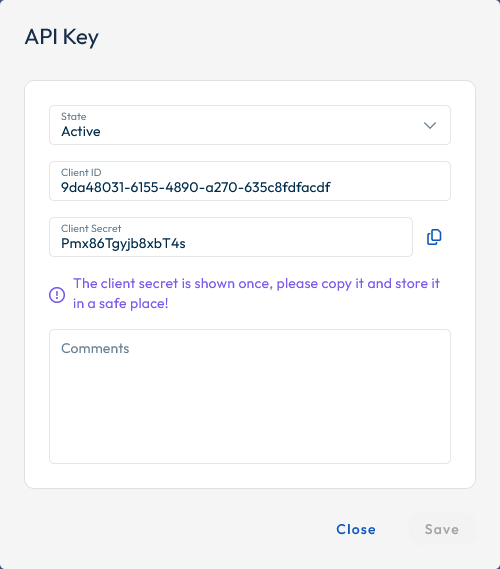
Partner users with admin access will be able to view the API Access section in Visit Connect, where they can view their Client ID and generate a Client Secret key.
Documentation is available here.
Embedding Connect into a 3rd party app
You can embed Connect into another party’s application by simply adding ?embedded=true at the end of the Connect URL. This will only show the Connections list and the Scan connection options, as well as the digital badge, and also prevent the on-boarding message from being displayed.
