Prerequisites
| Laptop | Windows / MAC | |
| Chrome / Edge / Safari | ||
| 2 free USB ports | one for the Touchpoint-linker, one for the label printer | |
| Touchpoint – linker + USB cable | used to assign Touchpoints to content | |
| Zebra Printer + label roll | used to print Touchpoint labels for easier identification | |
| VISIT user account | with access to event | |
| with VISIT “Profile & Products” permission | ||
| Default requirements | enough workspace | |
| Touchpoint tools | ||
| marketing materials | ||
Steps
1. Setup laptop
- Connect LINKER-touchpoint via USB
- Login in to VISIT with a user account with Touchpoint management permission
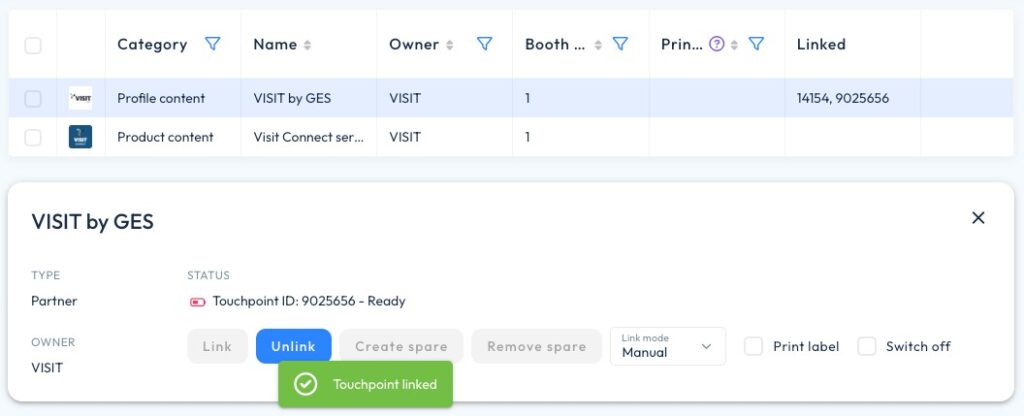
2. Activate LINKER-touchpoint connection
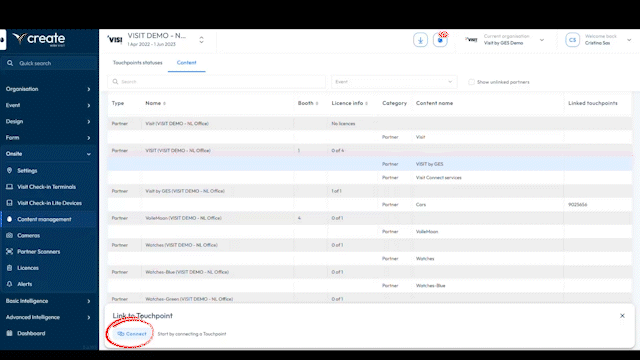
| 1. Go to the Content Management tab | Select show > Menu: Onsite > Content Management |
| 2. Select a Touchpoint content | A content popup will open |
| 3. Click on Connect | |
| 4. Select linker-touchpoint and connect | linker-touchpoint will blink blue |
3. Distribution
| 1. Administration | Follow organiser documentation process | ||
| 2. Turn on Touchpoint | Shortly press a pin into the hole next to the charger | ||
| 3. Hand out the touchpoint | |||
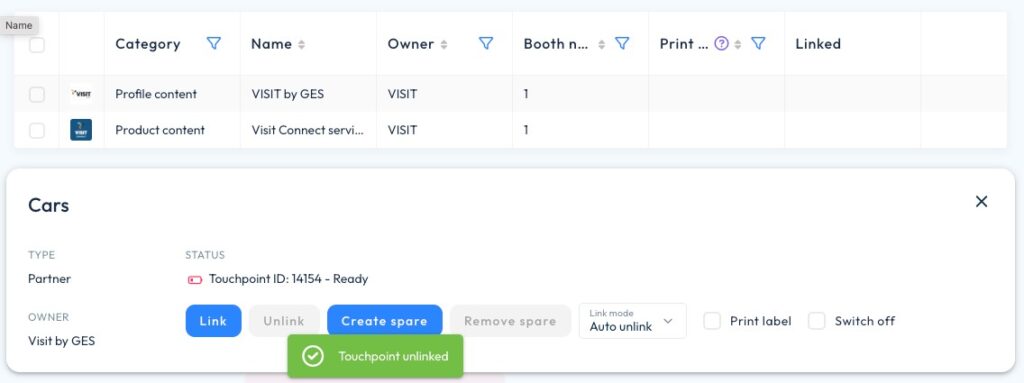
4. Replace
| 1. Select content | Menu: Onsite > Content management |
| 2. Link spare touchpoint | Place spare Touchpoint on the linker-touchpoint |
| 3. Replace the Touchpoint on the stand with the spare | |
| 4. Unlink replaced Touchpoint |
5. Auto unlink
| 1. Select content | Menu: Onsite > Content management |
| 2. Change link mode | Auto unlink |
| 3. Place touchpoint and await confirmation | Touchpoint unlinked |
| 4. Repeat step 3 |