Stripe is a payment processing platform that allows you to accept online and in-person payments.
It provides a range of financial services and APIs that enable you to handle payments, subscriptions, and other financial transactions.
Stripe’s BBPOS WisePOS™ is now integrated with Visit, offering secure and flexible solutions for onsite payments.
Pre-requirements:
- Stable internet connection on both Stripe reader AND Check-in terminal: Wi-Fi (preferable) or LAN (using docking station). No Internet means No payment.
- Stripe account with Server driven integration enabled.
- Some idea about physical placement of reader (electricity, anti-theft).
- If you have no previous experience with Stripe, you can experiment by making a test/Live PSP setup and play with an online form with Shop.
Preparation – in Stripe
1.Check availability of the reader in your country here: Regional considerations.
In most European countries, Stripe indicates that the server-driven integration is in Beta. This means that the integration is 100% working, but it is monitored closely and should be enabled by request.
If your country is marked with Beta, you might need to send an email to stripe-terminal-betas@stripe.com in order to have this type of integration enabled for your account: “I would like to enable ‘Server Driven Integration’ for terminal payments for my account acc_xxxxx”. The account number can be looked up from the dashboard (https://dashboard.stripe.com/settings/account). Note that in order to process Terminal payments, both the Stripe account receiving the funds and the location associated with the reader must be in the same country, accepting local currency only.
2.Order readers
- You can order Stripe readers from your dashboard: https://dashboard.stripe.com/terminal/shop
- There is an optional docking station: https://dashboard.stripe.com/terminal/shop/thsku_KZtRgDuMa3m0zx
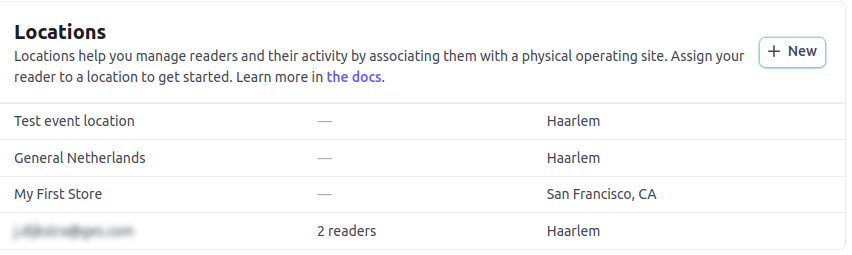
3.Create (or re-use) a location in your Stripe dashboard: https://dashboard.stripe.com/terminal. The address of the location defines the languages, currency and other settings which will automatically be applied to your reader.
- Click on + New and enter the address of the venue where the reader(s) will be placed. You can find the location key in your dashboard after it is created (by clicking on it, as last part of URL: /tml_xxxx…).
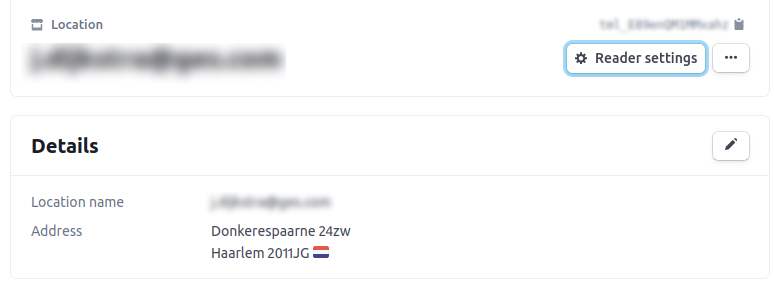
4.After the location is created, you can edit it by pressing Reader settings. You also have the option to upload a background image which can be shown on the reader:
Preparation – in Visit Create
1.Make sure you have a PSP profile setup for your Stripe account (Organisation > PSP Profile Setup)
2.Go to Event >Shop > Settings.
3.Select the Stripe account as Onsite PSP Profile and select the (earlier created) location key from Stripe:

4.In the onsite form which will be used for taking terminal payments, make sure that the Complete page has proper wording for page steps ‘Payment Page’ (redirect user to payment terminal) and ‘Payment Denied’ (in case there’s any problem with the registrant’s card).
You are now ready to go onsite.
Preparation Onsite (Check-in)
Please make sure you have finalised all the previous steps. When the Check-in terminals are setup onsite it is time to link each one of them to a reader. See Check-in for more details on settings.
1.Stripe readers can be connected to the internet by either Wi-Fi or LAN cable (when using a docking station). Good quality connection for both reader and Check-in terminal is essential.
2.A reader can be ’empty’ (not linked to any account at all) or ‘linked’. When turned on, an empty reader will show a linking code.

3.When the reader is not ‘empty’ (linked from previous usage), it can be emptied by generating a new pairing code for it: go to Settings screen and tap Generate pairing code. Find out more about how to set up the Stripe terminal here.
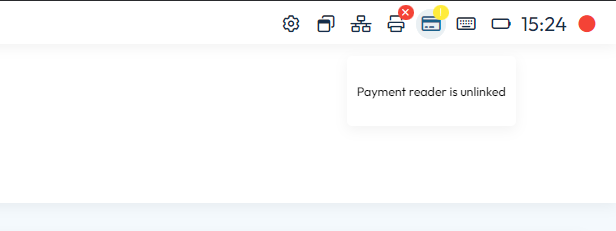
In the Check-in terminal interface, click on the new Payment reader icon to enable pairing:
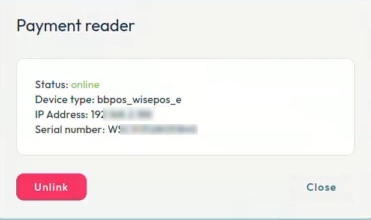
After pressing Link the reader will restart and start configuring itself. When linking is successful the status on the Check-in terminal changes and the payment reader icon is marked with a green dot:
Your Stripe terminal set up is now complete.
Usage
Start the Check-in in Self Service mode, select the desired shop items and add them to the cart, get to the order overview page and click Next. Depending on your translation, a message informing that you are about to pay will be shown on the Check-in screen, and payment can continue on the reader:
The stripe reader will display the total amount to pay. Tap your card or hold it near the Stripe reader to process the payment.
After the payment, the registration process will continue as usual on your Check-in terminal (i.e. printing badge and showing the Complete page).
Post-event
Unlink the reader from the Check-in terminal by pressing the Reader icon and selecting Unlink.