Access fromHome Page > Team
The Team section – if available – has two main purposes:
1. It allows admin users to add other team members for the event and email them their Visit Connect details.
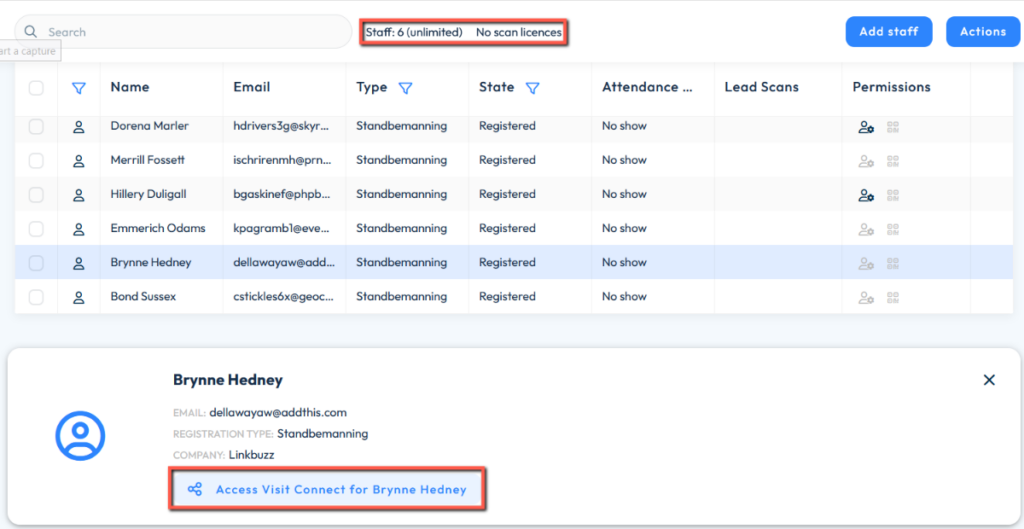
2. It gives an overview of the available licences, registered staff members and available complimentary badges, staff permissions, and attendance status at the event.

Adding staff
Depending on the settings enabled for your event, you may need to:
- Invite staff – you will be sending each team member an email invite through your Visit Connect account, and they will have to finish the registration process themselves.
- Register staff – you must register your team members yourself. Depending on the event, you will be able to do this either through a registration form created for this purpose, or straight from your Visit Connect account, in which case each registered staff receives a confirmation email upon completion of the process.
- Invite or register – you can choose between the two above-mentioned options.
To invite or register staff, click on Actions > Add Staff
Export Staff
To export your staff list go to Actions > Export all staff
Print Staff Digital Badges
To print all your team members’ badges, go to Actions > Print staff vouchers
Access Visit Connect Licences
To share licenses with your team members, you can go to Actions > Show licence QR code
For your registered staff, you can select each individual team member and then tap on Show Visit Connect login QR.
Email registration and access details to team members
Click on Actions > Send Confirmation email to email your staff the information regarding Visit Connect access, or select individual staff members and click on Access Visit Connect for X. From there you have the option to send their invite by email, show the QR code so your team member can scan it, or copy the licence URL and paste it wherever you need to.

Settings & permissions
Admins can change settings & permissions, as follows:
Settings:
- Visible to other visitors – allows visitors to find this team member and message them or request meetings.
- Available for meetings – allows visitors to contact this person for meetings. This requires the Public setting to be enabled.
Note that these settings are only available for events where the Meetings and/or Messaging features are enabled.
Permissions:
- Admin permissions – the user becomes an admin user;
- Show all connections – the user will be able to see the connections made by other team members;
- Allow capture connections – allows the user to make connections using Visit Connect;
- Allow export connections – when enabled, the user can export the connections.
- Access the company inbox – allows the team member to view and reply to company messages. Please note that this permission is only available for events where the Messaging feature is enabled.
Overview of rights for each user access level
| Admin | Staff | Scan Only |
|---|---|---|
| Dashboard | ||
| Team | | |
| Invite attendees | | |
| Manage questions | | |
| Profile & Products | | |
| Orders | ||
| Shop | ||
| Agenda | ||
| Registrants | ||
| Connections | Connections | Connections |
| Digital badge | ||
| Meetings | ||
| Messaging |
Setup mode
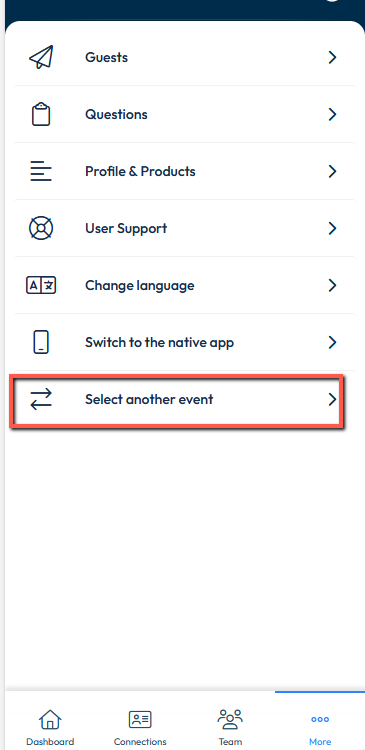
As an admin, you can access Visit Connect in Setup mode, where you can configure your team and environment, but this will not allow you to scan connections, nor reply to messages from visitors, or manage and attend meetings (if available). If you are attending the event in person, and you want to also make connections, message visitors, and participate in meetings, you must first register yourself as a team member and switch from Setup mode to Staff mode. You can switch modes by selecting Switch to another event in the app menu:

Go to Accessing Visit Connect to find out more about Setup mode.
Removing or editing staff members
In order to prevent errors in badge codes or collected connections, all requests for removing team members or changing their registration type must be addressed to the event organiser.
