This guide provides an overview of the different ways to access Visit Connect and the purpose of each method.
Watch a short video guide here.
Native App
The native app can be downloaded from the App Store. Before using the app, it must be activated with a licence key which can be found in the following places:
- Visit Connect Web App Teams > Actions > Show licence QR Code > Native app
- Visit Connect Web App Menu: Switch to Native App – This is a link to the Native App for the current user of the web app. It contains the licence key embedded in it and is intended for use as a support tool in case the user is encountering issues or challenges with the web app on their device.
Once the app is activated, it can be used to scan QR codes on visitors’ badges to make connections.
Web App – Setup Mode
As an exhibitor, you usually get started in Visit Connect with the setup mode. This is a special admin access that doesn’t include any scanning ability. It is designed to allow you to add user accounts for the team, set up questions to ask your visitors, and upload your exhibitor profile and products information.
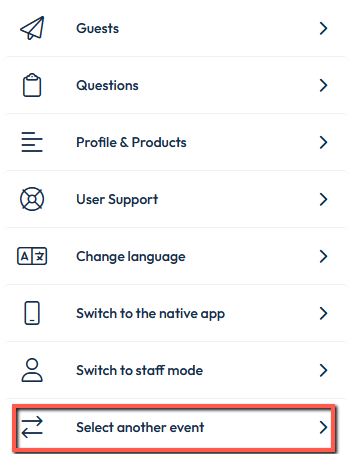
Setup mode is available via an URL in your confirmation email, and you can always return to it by selecting Switch mode from your app menu:

Web App – Staff Mode
Team members at the event should each have a personal link to Visit Connect. This is the recommended access for general use. Staff can collect and view individual information, and be assigned permissions to access specific features by an administrator.
Personal links can be found in the following places:
| Platform | Location | Purpose |
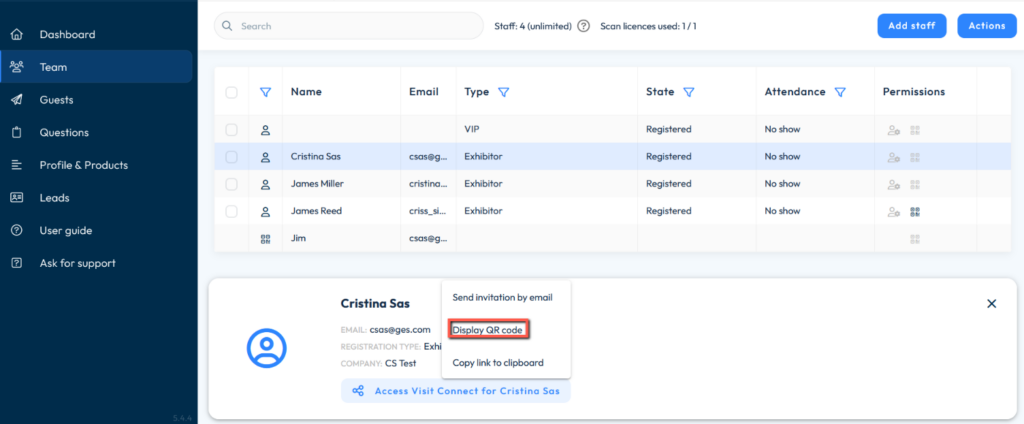
| Visit Connect Web App (admin only) | Team > Person’s Name > Visit Connect URL | For company admin to view/copy the URL to pass on to the team member |
| Visit Connect Web App (admin only) | Team > Person’s Name > Send Visit Connect URL | Send the system email containing the URL link to the team member’s email address |
| Visit Connect Web App (admin only) | Team > Person’s Name > Show Visit Connect login QR | Display a URL embedded in the QR code. The team member can then scan this with their mobile device camera to gain access. |
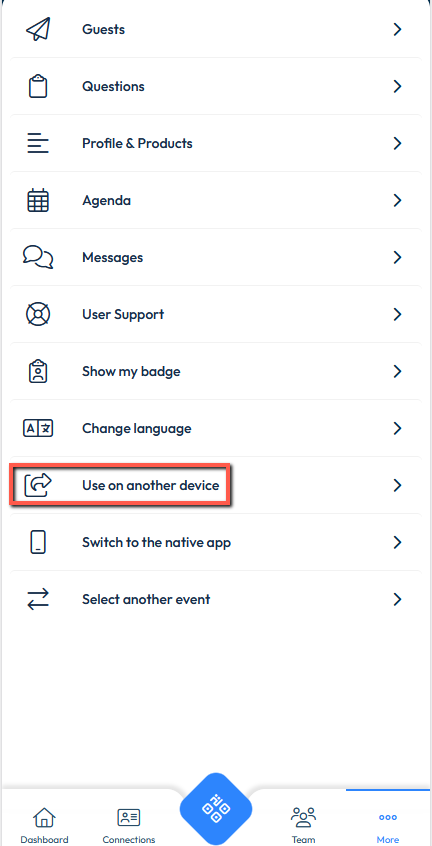
| Visit Connect Web App | App Menu > Use on another device | This displays a QR code containing a URL. It allows an individual to connect on another device, for example, an iPad where they don’t have access to their email. |


Setup mode vs staff mode
The user of the setup link is encouraged to register themselves as an individual first. However, this may not always be appropriate. For example, if the setup user is not coming to the event, and the exhibitor has limited badge allocation – registering such a team member would use an unnecessary licence.
If a user adds the app to their home screen while in Setup Mode, then it will always be launched in setup mode. They will be prompted in the future if they would like to switch to the staff mode. To avoid this, the user should delete the link from their home screen, and add it again with the link for their staff mode access.
Web App – Scan Only Mode
Scan-only mode is intended for cases where it is not appropriate to create a personalised staff account. Examples are when temporary staff are hired to scan connections and don’t have access to an email address to authenticate, or when a shared device is used on the booth by multiple people.
In this mode, Visit Connect can only scan connections, and see the connections collected on that device. This is similar to the native app functionality.
The Qr code for scan-only access is available in Team > Actions > Show licence QR Code > Web app.
